Open a terminal
- Open your project and confirm its device.
- Open the right panel and choose Terminal. If you already have a panel tab, choose Terminal from the new-tab menu.
- Wait for the shell to appear, then click inside the terminal to focus it.
- Enter a command and press Enter.
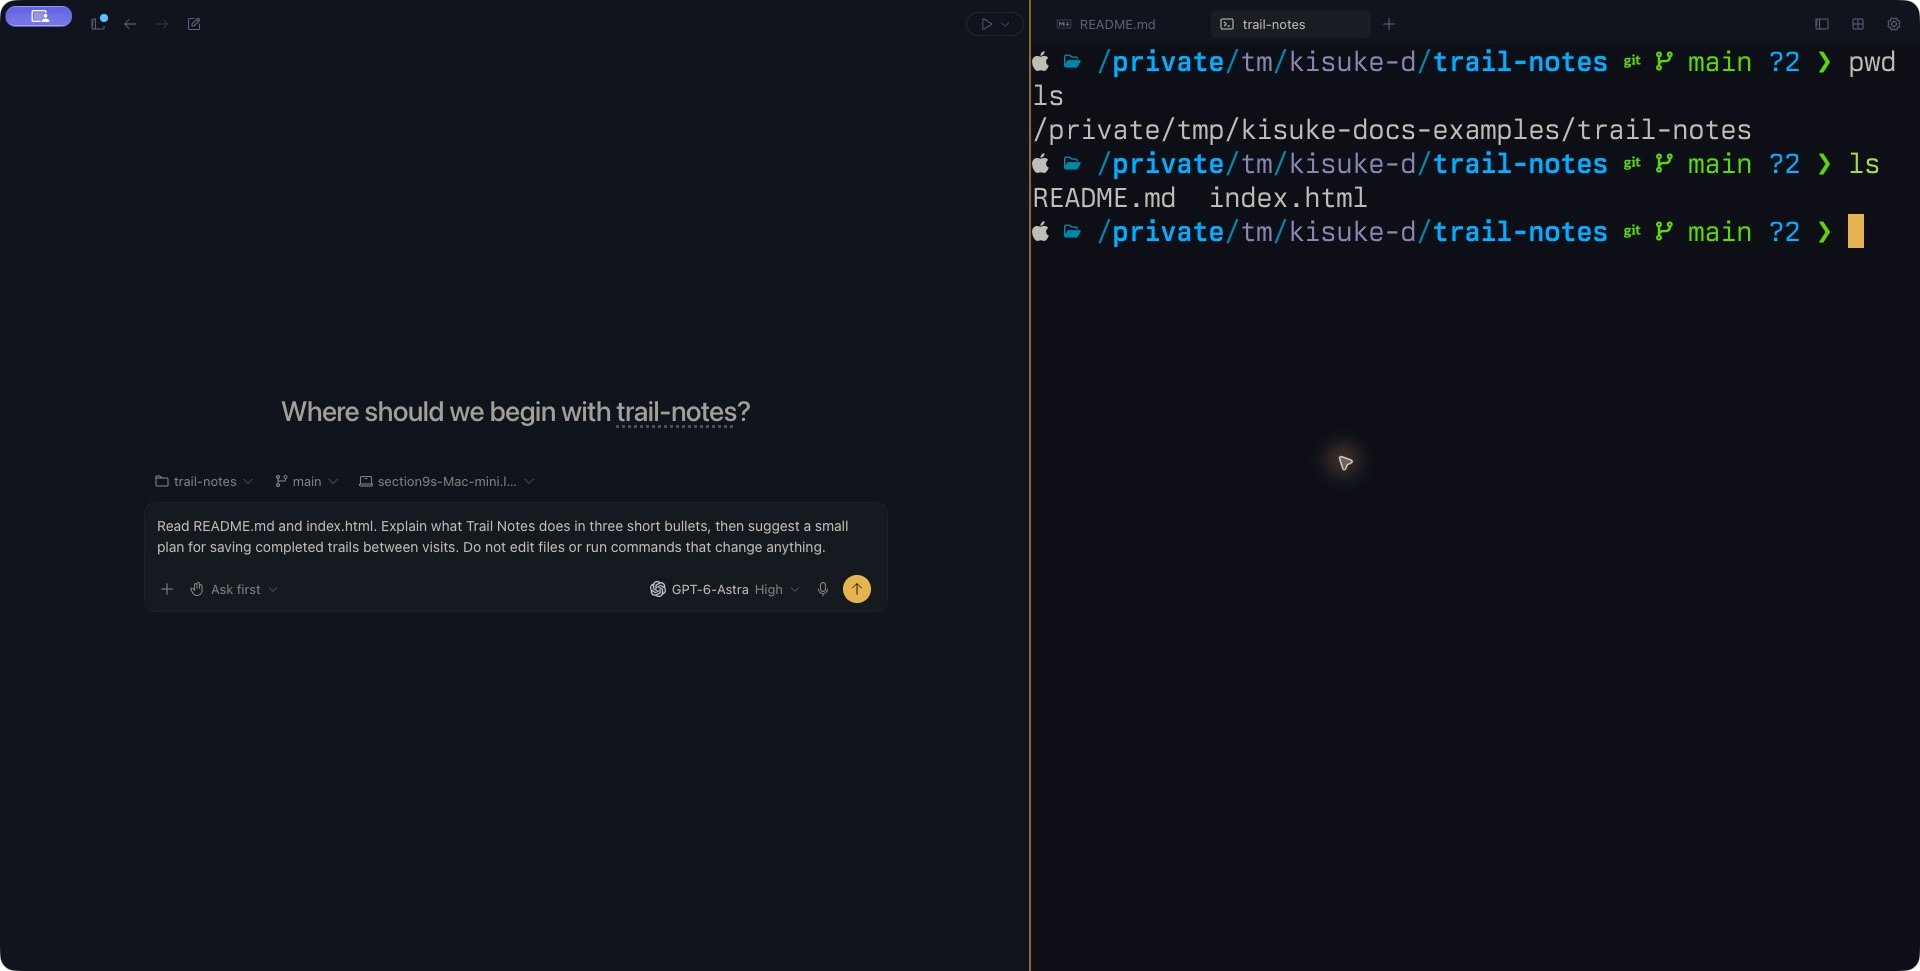
A terminal created for the Trail Notes project, showing real pwd and ls output beside a Zen draft.
Work with terminal tabs
Choose Terminal from the new-tab menu when you need another shell. Each terminal has its own tab in the Zen panel. Select a tab and focus its terminal before typing. Drag the divider between the conversation and panel to give commands and output more room. A tab’s title can change to reflect the process or working directory. Keep the intended project and conversation selected when returning to a terminal. After switching projects or worktrees, check the working directory again before running a command. A familiar prompt or retained output is not enough to identify the current project. For example, use one tab for a development server and another for tests. To reuse a command as a project action, see Run project scripts.Focus and input control
Click inside the selected terminal before typing. When you view the same terminal from more than one client, input control can move between those views. Output can remain visible in a view that does not currently control the shell. If typing has no effect, bring the intended client to the foreground, select the terminal, and focus it again. Check the project connection before trying more input. Coordinate with anyone using the same terminal so that commands and resizing do not compete between clients. After an interruption, inspect the shell’s current line and output before resending a command. Missing feedback does not prove the original input was discarded. This matters especially for commands that create files, commit changes, or start another process.Copy output into a conversation
On desktop and web, you can move selected output into a draft without sending a message:- Drag across the command output you want to discuss. Check that the intended lines are highlighted.
- Right-click the selection and choose Add to Chat.
- Check the composer: the selected text appears inside a code block, and focus moves to the draft.
- Add your question, check the destination conversation, and send when you are ready.
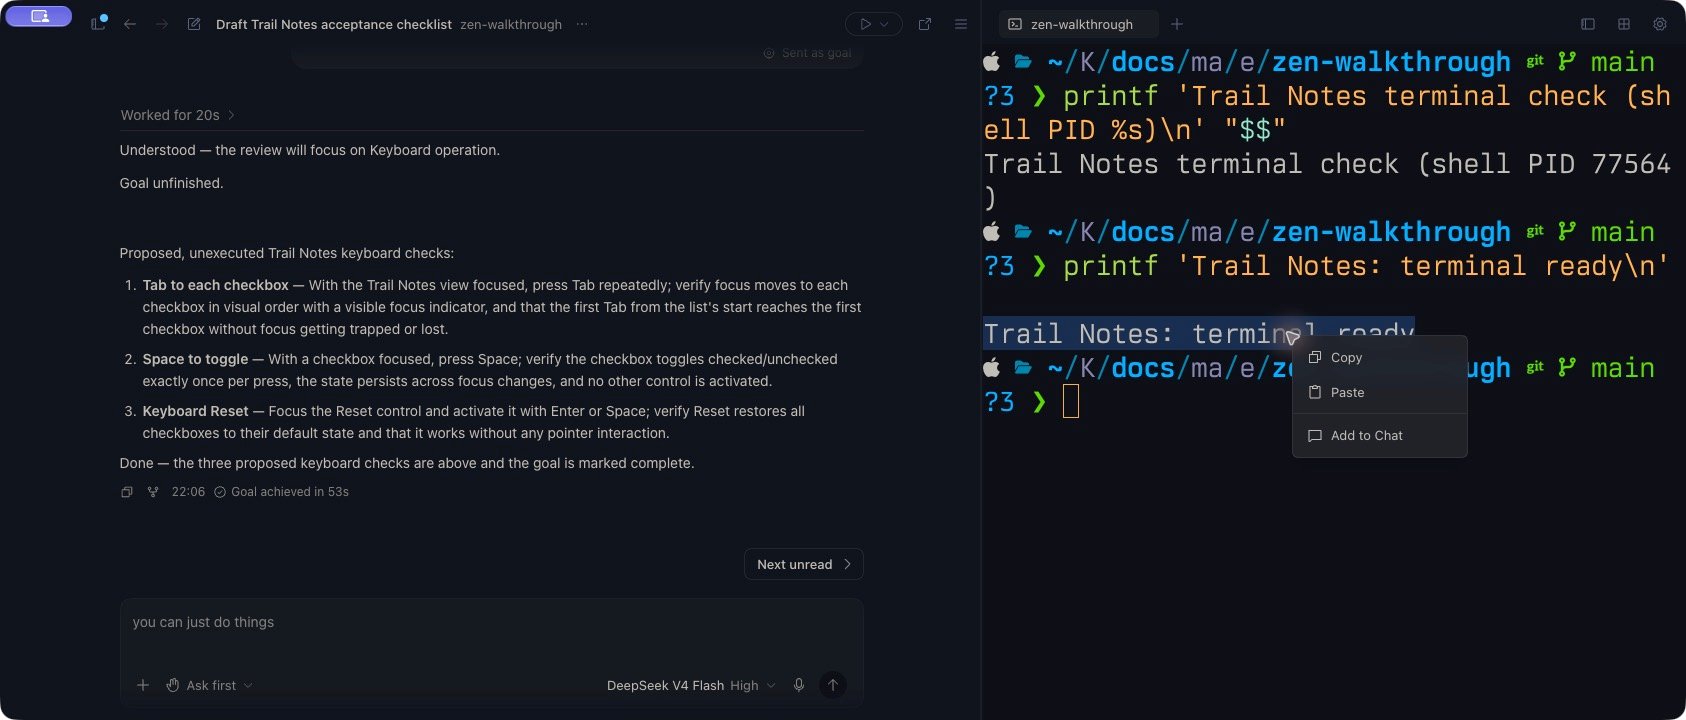
Select the relevant output, then choose Add to Chat from the terminal's context menu.
View the resulting draft in Zen
View the resulting draft in Zen
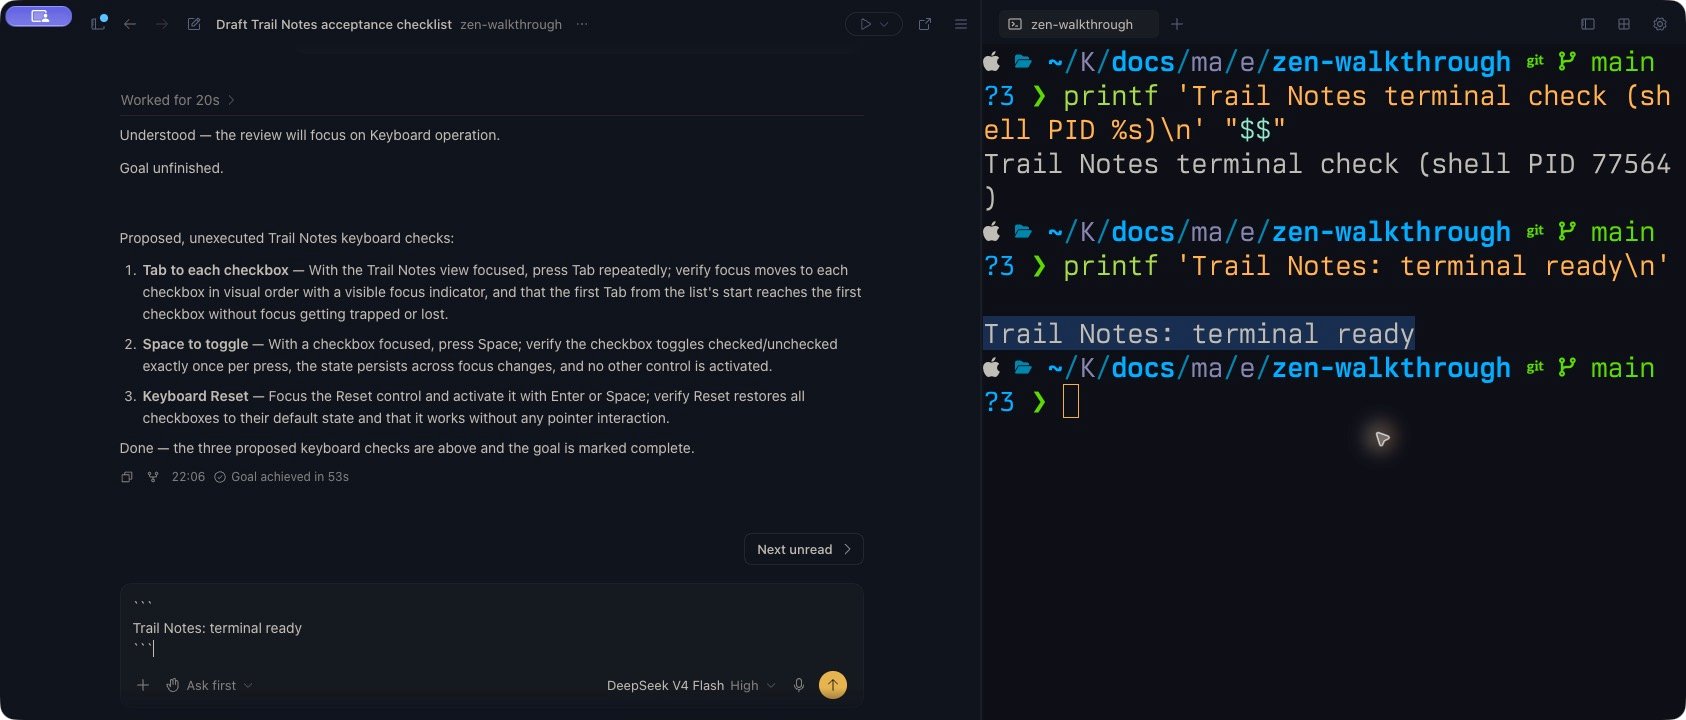
Use Copy and Paste
Use Copy when you want to choose where the selected text goes:- Highlight the terminal text, right-click it, and choose Copy.
- Click the destination, such as a particular conversation’s composer, and use its paste shortcut.
- Inspect the pasted text. In a conversation, add your question and review the draft before choosing Send.
- Copy the command and review its contents, including any line breaks.
- Select the intended terminal tab and check its project, working directory, and current input line.
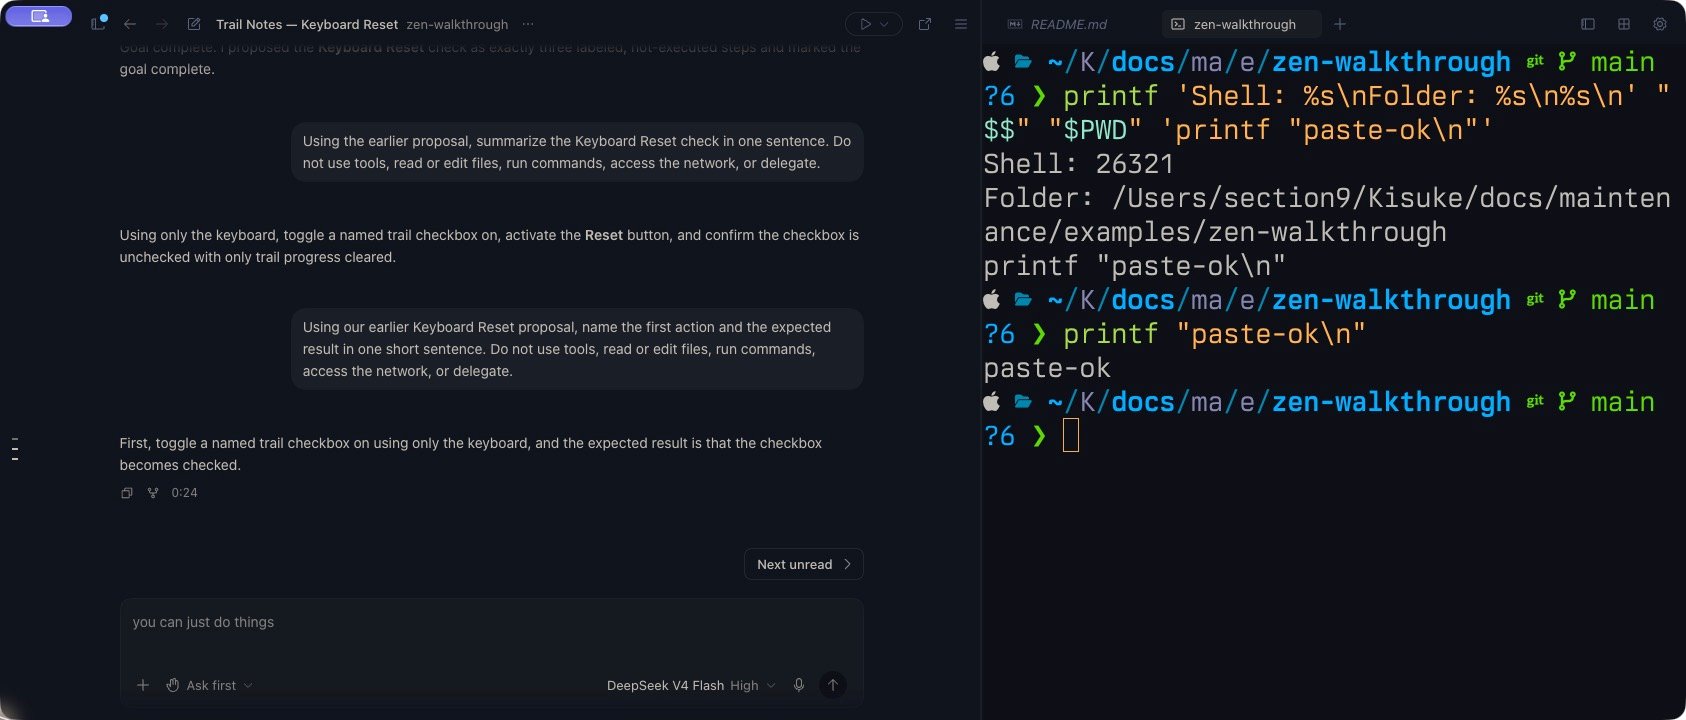
- Right-click inside the terminal and choose Paste. If the shell is still waiting for Enter, inspect the line before submitting it.
- Read the resulting output and check whether the shell has returned to a prompt.
In this macOS shell, the single-line command was pasted, then submitted with Enter. It printed paste-ok and returned to the prompt.
View the clipboard example in Zen
View the clipboard example in Zen
Interrupt, hide, clear, or close
Choose the action that matches what you want to stop or remove:- Interrupt a command: focus the terminal, clear any text selection, and press Ctrl+C. The running program decides how to handle the interrupt; check for its result or a returned prompt. This is separate from stopping an agent response.
- Hide the panel: choose Hide Panel when you want more space for the conversation. Hiding is a presentation action and does not request that the shell exit. Reopen the panel and select the existing tab to return.
- Clear the display: on desktop, choose Terminal → Clear Terminal for the focused terminal. This clears the terminal display buffer and can remove the visible prompt too. The shell remains running; clearing does not erase its command history or create a new session.
- Close the session: use the close control on its terminal tab. This requests termination of that shell. Finish or stop work you need before closing it. Closing the last panel tab hides the panel; reopen it to check whether the terminal is still listed.
Use a terminal on mobile
The iOS and Android terminal screens use the project’s device connection. Connect to the device and select the intended project first.- Open Terminal in the workspace and wait for the shell to appear.
- Open the terminal sidebar to view the Terminals list. Select an existing session, or use + in that list’s header to create another.
- Use Show keyboard to enter input. If the command bar is shown, type in Terminal command and use its send arrow or the keyboard’s send key to submit the line.
- Check the terminal output for the command’s result before moving on.
If the terminal will not start or accept input
Starting terminal or Loading terminal…
Starting terminal or Loading terminal…
Wait for the shell to appear. A tab or loading label alone does not establish that a terminal is ready for input. Confirm the project’s device is connected. If startup remains stuck, keep the current tab while checking the connection instead of creating several replacements.
Too many terminals open. Close one first.
Too many terminals open. Close one first.
Close a session you no longer need, wait for it to disappear, then request another. Hiding a panel does not free a terminal session.
Terminal request timed out
Terminal request timed out
Check the connection and existing terminal tabs before requesting another. A timeout can leave you uncertain whether creation succeeded; a terminal may already have appeared.
Could not create terminal while this project is disconnected
Could not create terminal while this project is disconnected
Restore the connection to the project’s device, return to the intended project and conversation, then check the terminal list. Use the device guide’s connection checks if the project remains unavailable.
The output or prompt looks stale after reconnecting
The output or prompt looks stale after reconnecting
Return to the same project, conversation, and terminal tab. Wait for the connection and refreshed output, then use a harmless command such as
pwd at a shell prompt to confirm interaction. Do not assume the process survived a host restart or that an earlier command failed merely because the display has not caught up.