SKILL.md file with reusable instructions. Use one for a repeatable task such as reviewing accessibility, investigating a bug, or following a release checklist. When you invoke a skill in Kisuke, its contents become context for the request.
For conventions that apply throughout a project, start with project instructions.
To connect an external tool or data source, configure an MCP server. A skill’s instructions alone do not establish that connection.
Skills are discovered from several harnesses’ directories. You do not need a separate copy just to select the same skill in another Kisuke harness. The model, tools, and permissions available to the request still depend on the conversation.
Choose a scope
Put project skills on the device that owns the project. User paths refer to the home folder of the user running Kisuke’s daemon on that host; they do not mean the home folder of every device viewing the conversation.
Add a project skill as a file
Create this structure in your project’s working folder:review-trails for invocation. Add a one-line name and description between the opening --- fences, followed by the instructions:
SKILL.md; a Markdown file placed directly in the skills directory is not the same structure.
Project skill files can be versioned with your repository. Check the project’s ignore rules before expecting them to appear in Git.
Create a skill in Settings
The desktop Settings → Skills page includes All, Project, and User filters, a Refresh control, and separate buttons for creating a skill or command.- Choose + Skill.
- Enter a Name and a short Description.
- Choose the Scope. User is the initial selection. Project is available only when the form has a project context.
- Enter the instruction body under Skill Instructions.
- Choose Create Skill and check the result in the list.
.claude/skills/<folder-name>/SKILL.md, either in the host user’s home folder or in the project. Kisuke normalizes the name into a folder name; using lowercase letters and hyphens makes the invocation predictable.
Invoke a skill
- Open a conversation for the intended project.
- Type
/followed by the skill’s folder name. Check the scope and description, then choose the matching skill from the composer menu. - Add the task-specific instructions after the skill chip.
- Send the message.
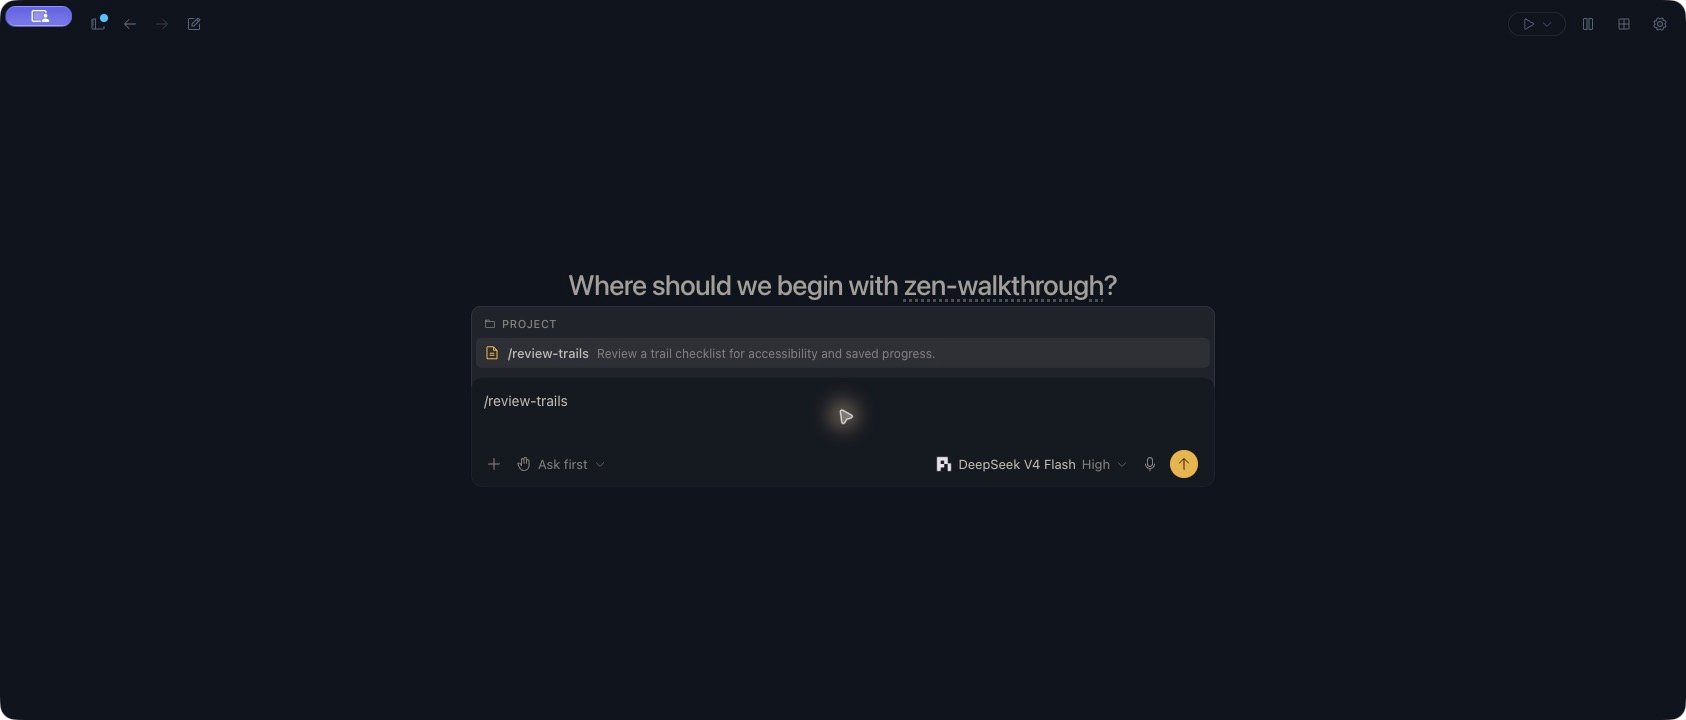
The review-trails skill appears under Project in Zen's slash menu.
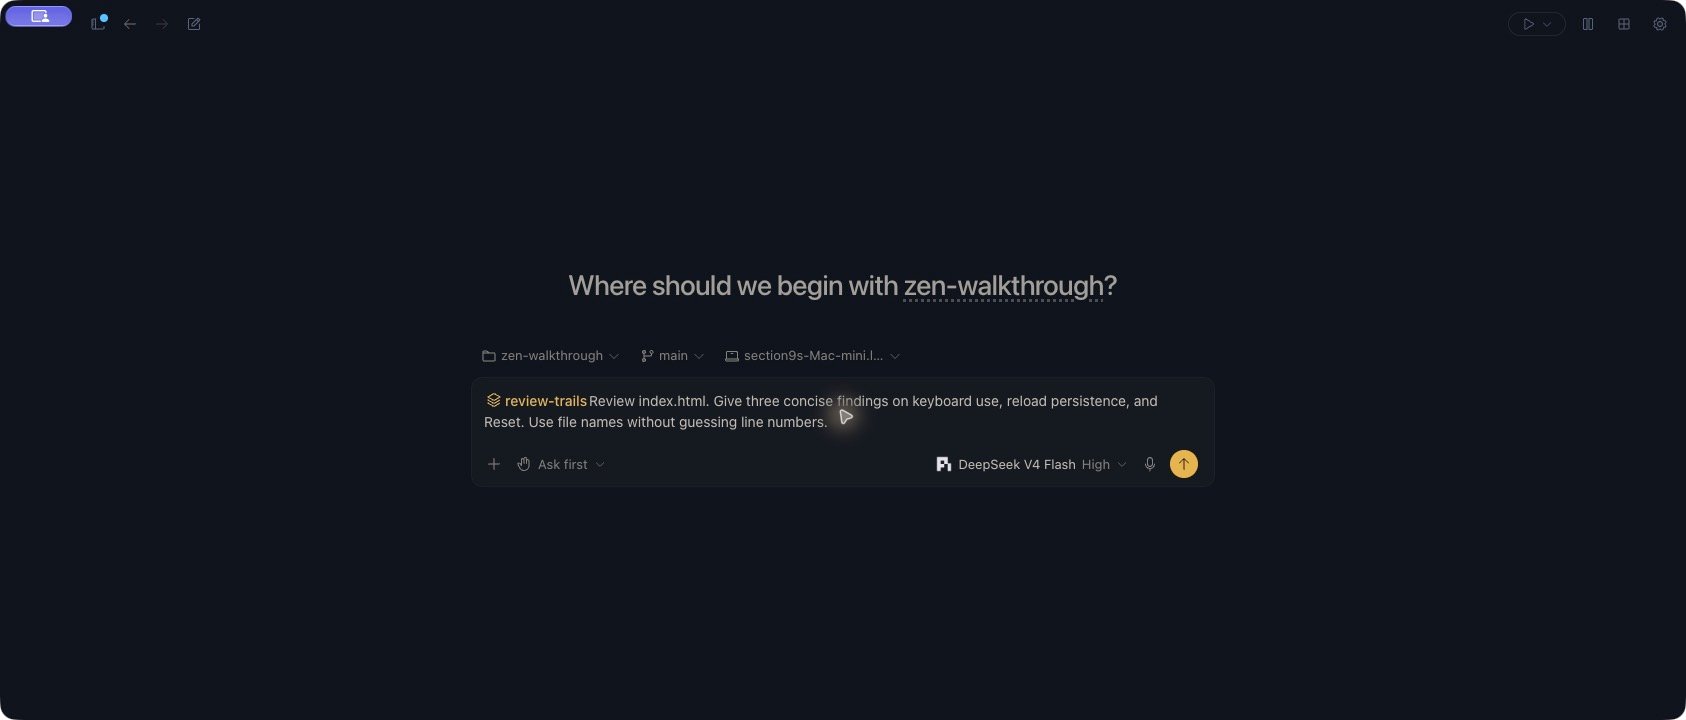
View the skill and task in a Zen draft
View the skill and task in a Zen draft
Check the result
Read the response alongside the task you sent. Confirm that it addresses the requested files and follows the skill’s review procedure. Inspect file references and tool results before treating a finding as verified. In the example above, Pi with DeepSeek V4 Flash received both the savedSKILL.md contents and the separate review request. It read index.html, returned three findings, and marked browser checks as not run. The review did not edit the project or run tests.
A source review can explain how persistence or keyboard controls are implemented. Use Browser to check the actual interaction, or request a separate test run when you want execution. Keep unperformed checks separate from observed results.
Existing skill locations
Kisuke scans these locations for skill folders:- Shared agent skills: project
.agents/skills; user~/.agents/skills. - Claude: project
.claude/skills; user~/.claude/skills. - Codex: project
.codex/skills; user~/.codex/skills. - OpenCode: project
.opencode/skills; user~/.config/opencode/skills. - Gemini: project
.gemini/skills; user~/.gemini/skills.
SKILL.md. Hidden child folders are skipped. Links to the same underlying skill are deduplicated in the catalog.
Kisuke also has a user-skill synchronization mechanism that can create directory links into ~/.claude/skills, ~/.codex/skills, and ~/.agents/skills. Existing files, directories, and links not managed by Kisuke are left in place. This mechanism does not create those links inside your project. Native command-line tools have their own loading behavior; discovery in Kisuke does not prove that every external tool has loaded the skill.
For synchronization between computers, enable Skills in Device Sync. That category is off by default and covers supported user skill folders, separately from the local directory links described above.
Edit a skill or use a command instead
Use a skill’s edit control in Settings to change its instructions, then choose Save Changes. You can also editSKILL.md directly. Changing the displayed name of an existing skill in Settings does not rename its folder; use the folder name shown in the composer for invocation.
Skills and commands share the settings list, but serve different purposes:
- A skill adds reusable instructions as context alongside your request.
- A command uses a saved prompt template as the message, replacing
$ARGUMENTSwith the arguments you provide.
Troubleshoot discovery and invocation
Keep a copy before using the delete control: deleting a skill removes its folder and supporting files, not just its entry from the list.