A provider connection does not make every model available through every harness. The picker reflects the selected device, harness, and available catalog.
For related terms such as turn, goal, Side Chat, and worktree, use the glossary.
Harnesses in Kisuke
Kisuke has native integrations for these agents:
OpenAI Codex is labelled Codex in the composer picker.
The harness catalog also includes the following agents. Open Settings → Harnesses and search by name to inspect their availability on your computer.
Browse the other harnesses
Browse the other harnesses
- A–F: Agoragentic, Amp, Auggie CLI, Autohand Code, Cline, Codebuddy Code, Cortex Code, Corust Agent, crow-cli, Cursor, DeepAgents, DeepSeek Harness, Devin, DimCode, Dirac, Factory Droid, fast-agent.
- G–O: Gemini CLI, GitHub Copilot, GLM Agent, goose, Grok Build, Junie, Kilo, Kimi CLI, Minion Code, Mistral Vibe, Nova, OpenCode.
- P–Z: Poolside, Qoder CLI, Qwen Code, siGit Code, Stakpak, VT Code.
Choose a harness and model
Start with the access or agent you already use:
Then make the selection in Zen:
- Start a new conversation in the project you want to work on.
- Open the model button in the composer. You can also use Cmd+/ on macOS or Ctrl+/ on Windows and Linux.
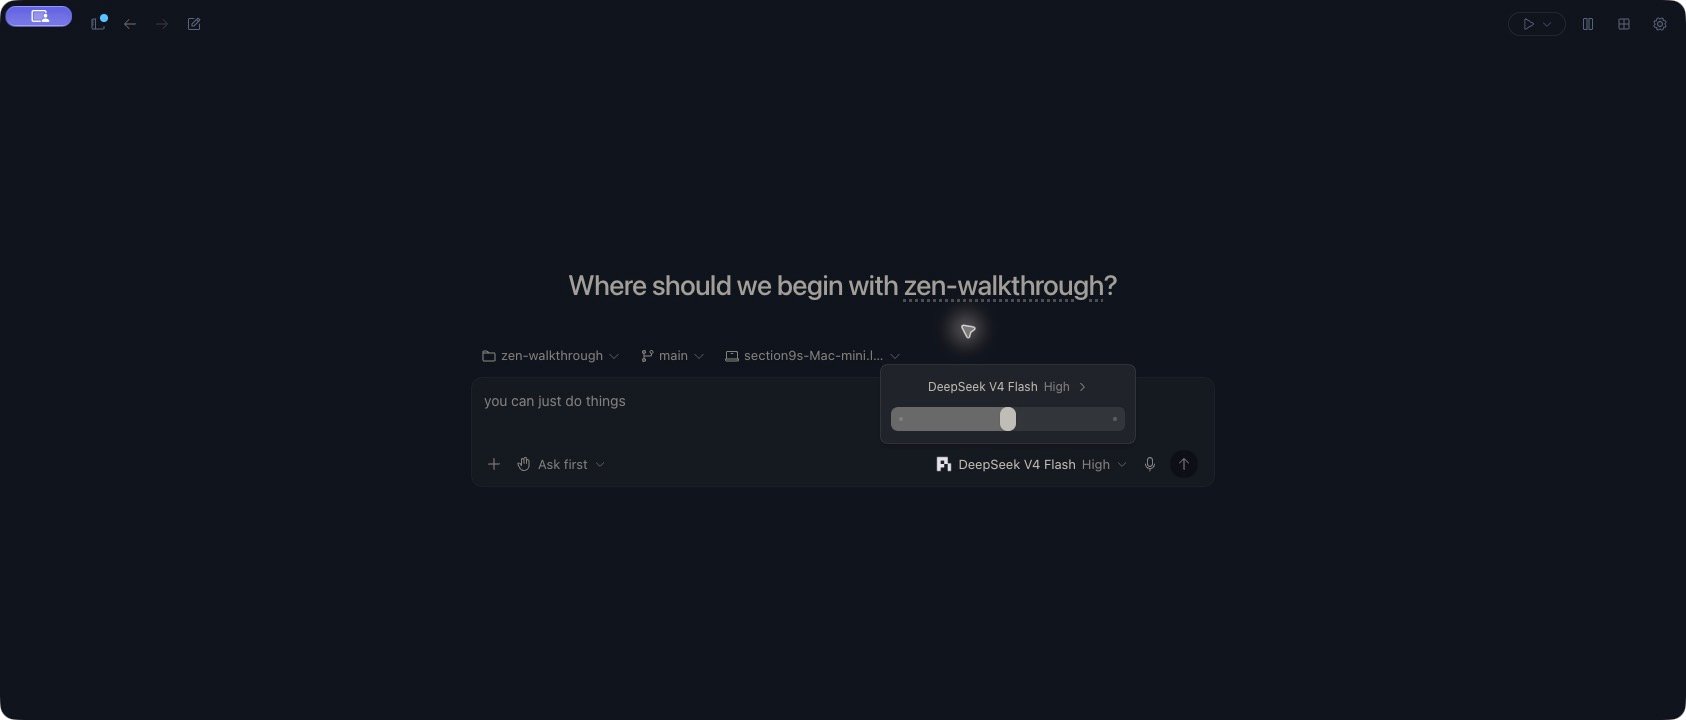
- If the picker opens on a reasoning slider, select the model name above it, labelled Choose harness and model, to open Select model.
- Choose an available harness in the left column. Wait for its model list; changing the harness clears the search, so enter your search again afterward.
- Search for a model name or provider. Models are grouped by provider.
- Select a model, review its reasoning setting if one is offered, and return to the composer.
- Check the project, device, model, reasoning level, and permission mode before sending. Changing the harness can change the displayed model, reasoning, and permissions; do not assume the previous choices carried over.
Review the model and reasoning control before your first prompt. This new Zen draft has Pi, DeepSeek V4 Flash, and High selected; nothing has been sent.
View the model choice in the full Zen draft
View the model choice in the full Zen draft
OpenAI, Anthropic, and Google
Connect accounts in Providers, then return to the composer to see what is available.- OpenAI: connect the provider using an authentication method offered in Settings. Available models appear under the OpenAI provider group.
- Anthropic: the direct Anthropic provider integration is restricted to Claude Code. Do not expect its models in every harness’s list.
- Google: the Google provider’s API-key integration is distinct from Antigravity, which has its own Google sign-in flow and account-dependent model catalog.
Adjust reasoning
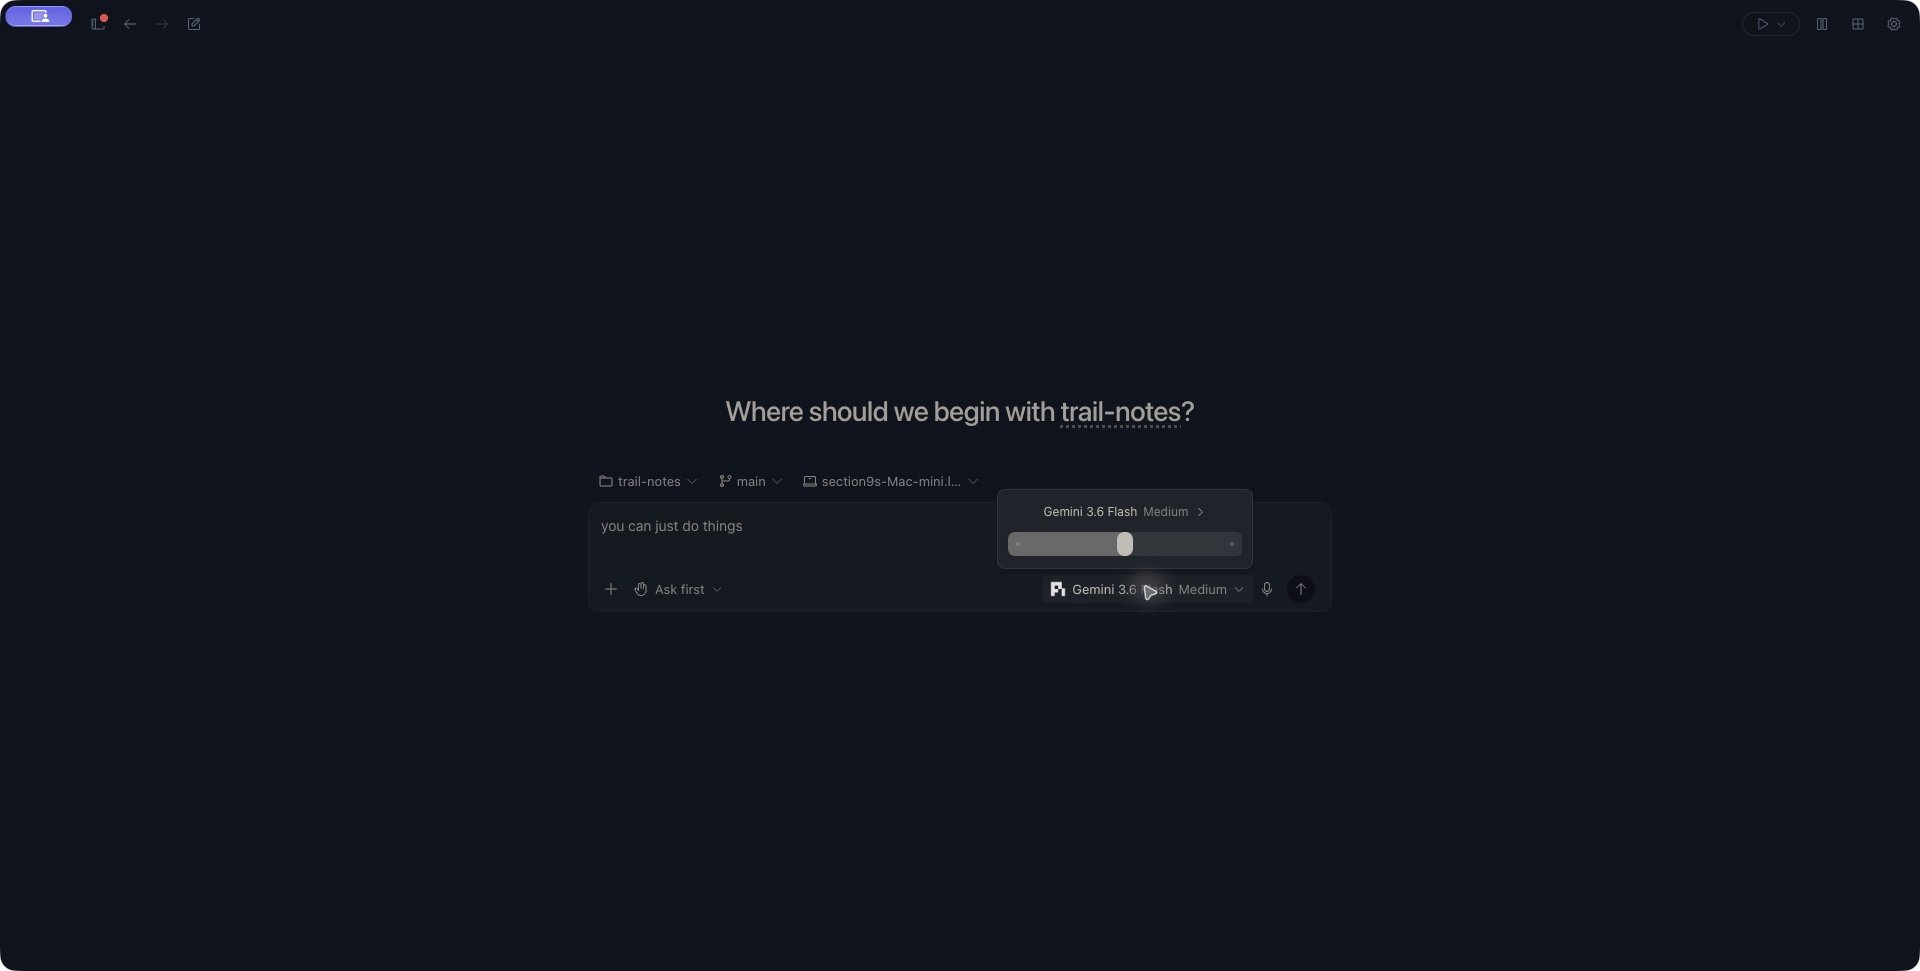
When the selected model supports configurable reasoning, the picker offers a Reasoning level slider. Available levels depend on the model and harness. Some combinations manage their own settings and do not offer the same controls. Changing the model may also change the available reasoning levels. Kisuke keeps your previous level when the new model supports it; otherwise, it uses an available default. Check the setting again after switching models. Off appears only when the selected model offers it.Antigravity model families
Some Antigravity models group effort variants under one model family. For these entries, select the family and use the reasoning control to choose an available level. Other models can keep variant labels such as Low, Medium, or High in separate model rows. Review both the selected row and any reasoning control it offers. For example, the Gemini family below offers Medium in the reasoning control. The selected account’s available models determine which families and levels you can use; this illustration is not a fixed catalog.The reasoning control for an Antigravity Gemini family in a new Pi conversation. Medium is selected.
View the full Gemini draft
View the full Gemini draft
Change a selection before sending
Choosing a model or reasoning level stages the selection in the composer. Send your next prompt to submit that choice for validation. A picker click alone does not reconfigure an already running turn. To use another model in an existing conversation:- Let the current response finish, or stop it and check its result before continuing.
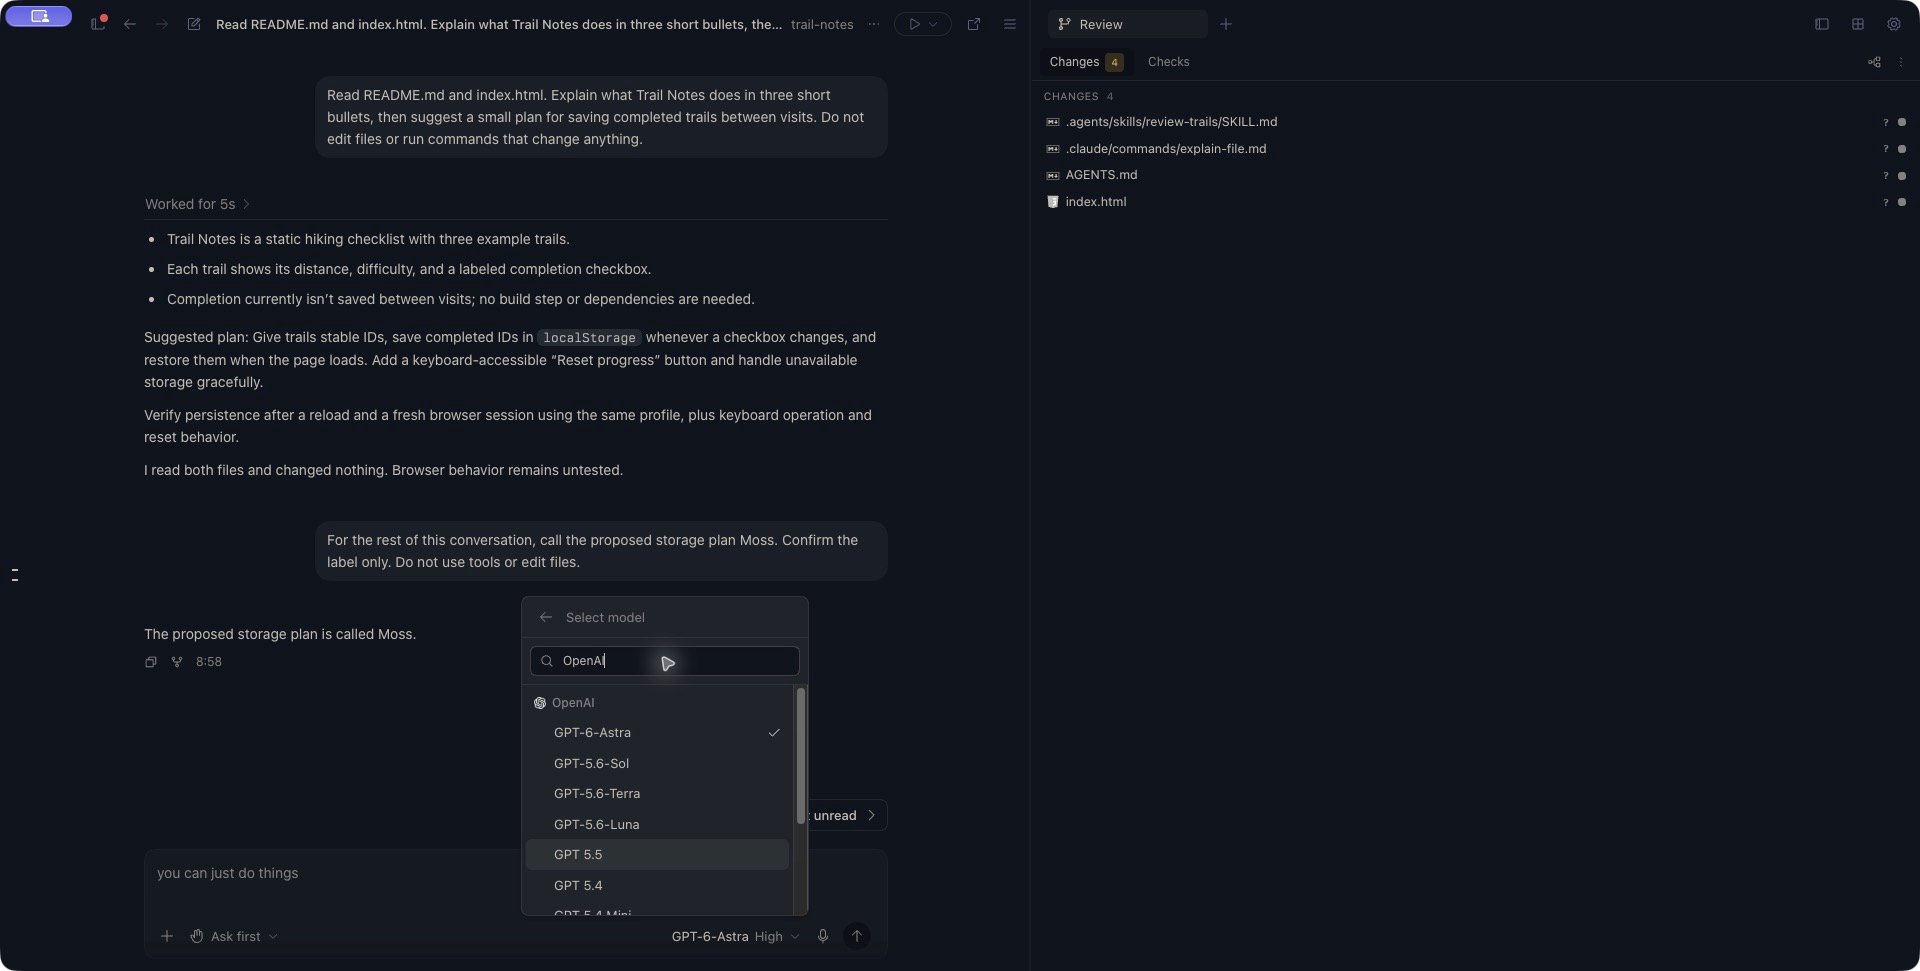
- Open the composer model button. If it shows Reasoning level, select the model name above the slider to open Select model.
- Search by model or provider name, then select an available result. The harness column is hidden because this conversation already has a harness.
- Review the reasoning level, close the picker with Escape, and check the model name in the composer.
- Enter and send your next prompt. Wait for a complete response before relying on the new combination.
Detail of a provider-name search in an existing Codex conversation in Zen. The checkmark identifies the selected model. This is an example catalog, not a complete availability list.
View the full Zen workspace
View the full Zen workspace
Choose on iOS or Android
Open Chat settings from the composer. In a new conversation, choose Harness, then Model. Search by model or provider, select a result, and return to Chat settings to review Effort when it is offered. Model and effort selection are unavailable while the mobile conversation is streaming. Wait for that response to finish or stop it before changing the next selection. An existing conversation keeps its harness; start a new conversation to choose another one.Manage harnesses on a computer
Open Settings → Harnesses to inspect agent software, choose a default for new chats, or install an agent when an Install button is offered. Connecting a provider and installing a harness are separate steps. On desktop, use this panel on the computer running Kisuke Connect for the chat. Its inventory includes bundled agents, such as Claude Code and Pi, and external agents that Kisuke can detect.Global Harnesses settings do not necessarily follow the device of your open project. The panel has no device selector. If you use several computers, open the desktop app on the intended computer before changing its default or installation. Mobile controls manage a connected computer; they do not install the agent on your phone.
Read the availability report
Search for the agent by name. After detection, the list uses these groups:
The composer normally lists installed harnesses. An agent under Runs on demand can be absent from that picker; use its offered installation method and check detection again. A previously selected harness can remain visible even after it becomes unavailable.
Rows can show several installations, their versions and paths. used marks the selected installation when there is more than one candidate. This helps when updating one copy leaves Kisuke using another.
Choose Re-scan after installing or updating an agent outside Kisuke. This checks the agent software again; it does not sign you into a provider or verify a model response.
Set the default for new chats
Under Default harness → New chats run on, choose an available agent. Desktop and web use a dropdown; iOS and Android show selectable rows. Wait for the displayed selection to update, then return to your workspace and inspect the harness in a new conversation before sending. This setting supplies a default. You can choose another harness in a new conversation’s composer. Existing conversations retain their harness. Review Device Sync if you share agent preferences between computers.Install or update an agent
When an Install button is offered:- Review the displayed installation command. On desktop, hover or focus the button to see it; mobile shows a command row.
- Choose Install to run that package manager on the Connect computer. Copy install command only copies the command.
- Watch Installing… and the output or error below the agent. After success, let detection finish and check the resulting group and selected installation.
- Return to a new conversation, select the harness and model, and verify a complete response.
Installation failed or the connection was lost
Installation failed or the connection was lost
Read the agent’s error. An
npm or uv not-found message means the required package manager is unavailable to Connect on that computer. Follow the agent’s installation guidance, then re-scan.If the connection disappears during installation, a missing success message does not establish that nothing was installed. Reconnect and re-scan before starting another attempt. If files were installed but validation failed, preserve that error and inspect the selected installation.The agent is installed, but its model list looks stale
The agent is installed, but its model list looks stale
On desktop and web, some harness rows offer Refresh this agent’s model list. Hover or focus the row’s refresh icon, activate it, then return to the composer and check its catalog state. Mobile Harnesses settings do not have this per-agent model refresh control.Re-scan checks installations; model refresh requests a new catalog. A returned model count does not verify provider access or a completed response. Use the picker’s error and Retry when offered.
When a model is missing
Model lists can change as provider catalogs and account access change. Use the current picker instead of treating a screenshot or example model name as an exhaustive list.
If sending the first prompt fails even though a model is visible, see Troubleshoot a first message. For controls that govern what the agent may do, see Permissions.