Attach a file
- Check the selected project and device. The project device must be reachable for the attachment upload.
- Choose the composer’s + button, Attach files. You can also press Cmd+Shift+A on macOS or Ctrl+Shift+A on Windows and Linux.
- Select one or more supported files in the file picker and open them.
- Check the attachment chips above your prompt. Wait for processing and uploading to finish, and resolve any error indicator before sending.
- Write what you want the agent to do with the attachments, then send your request.
The attachment chip shows the filename and size. Check it before sending your request.
View the full Zen workspace
View the full Zen workspace
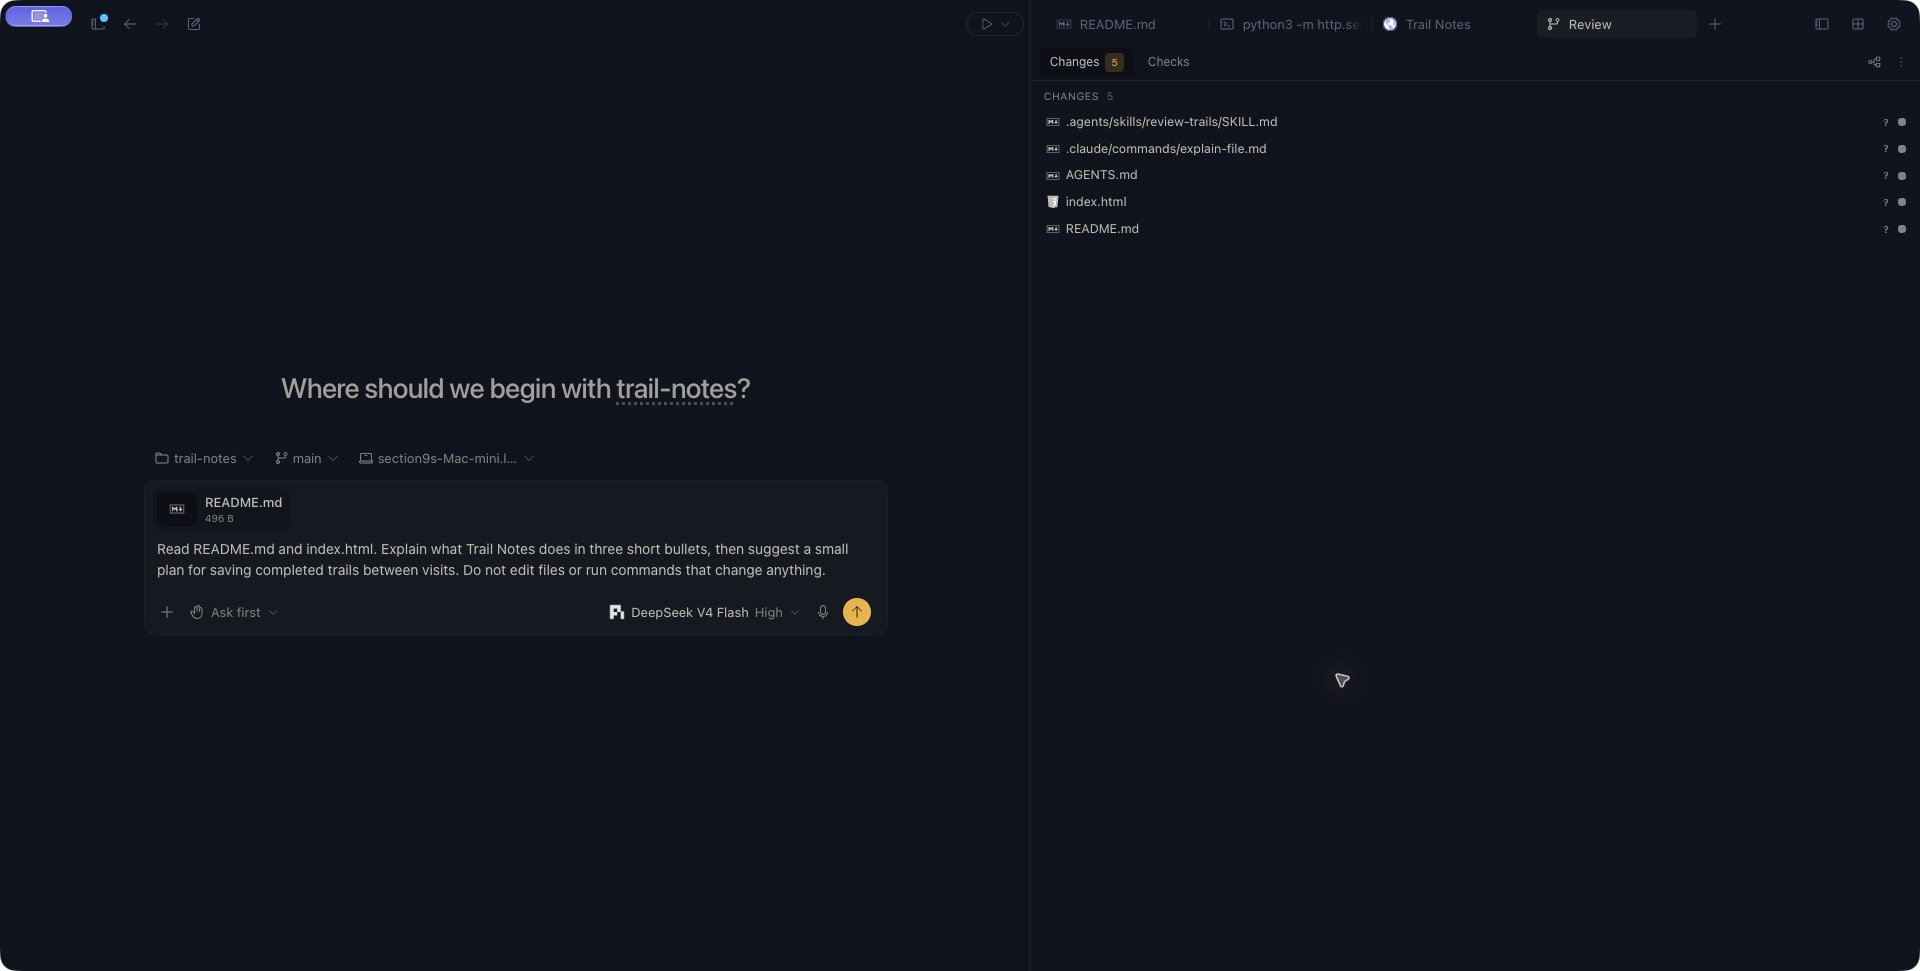
Choose the right format
The desktop composer accepts common text and code files, PDFs, and images. Examples of text and code formats include Markdown, JSON, YAML, CSV, JavaScript, TypeScript, Python, HTML, and CSS.
The desktop composer holds up to 5 image attachments and 10 file attachments at once. A long text paste uses a file slot. If you select more than the remaining capacity, check which chips were actually added.
Upload success means the attachment copy reached the project device. It does not establish that a model can read every format, that the whole file fits in context, or that the agent has already inspected it.
For example, Codex and Pi receive ordinary file attachments as references to files on the project device. Claude Code can include text or PDF content directly, while larger documents may be supplied as file references. Ask for the specific section or comparison you need rather than assuming every attachment is inserted in full.
If your goal is visual inspection of an SVG or another non-raster image, attach a PNG or JPEG rendering as well. Keep the original file attached when you also want the agent to inspect or edit its source.
Paste a long document
Long plain-text pastes can become a Pasted text attachment instead of filling the composer. You can keep your instruction short while supplying the longer reference separately.- Paste the text into the composer.
- If it becomes a Pasted text chip, choose Click to expand to inspect it.
- In Zen, the text opens in the right editor panel as a read-only document.
- Return to the composer and write your instruction. Closing the preview leaves the attachment in the draft.
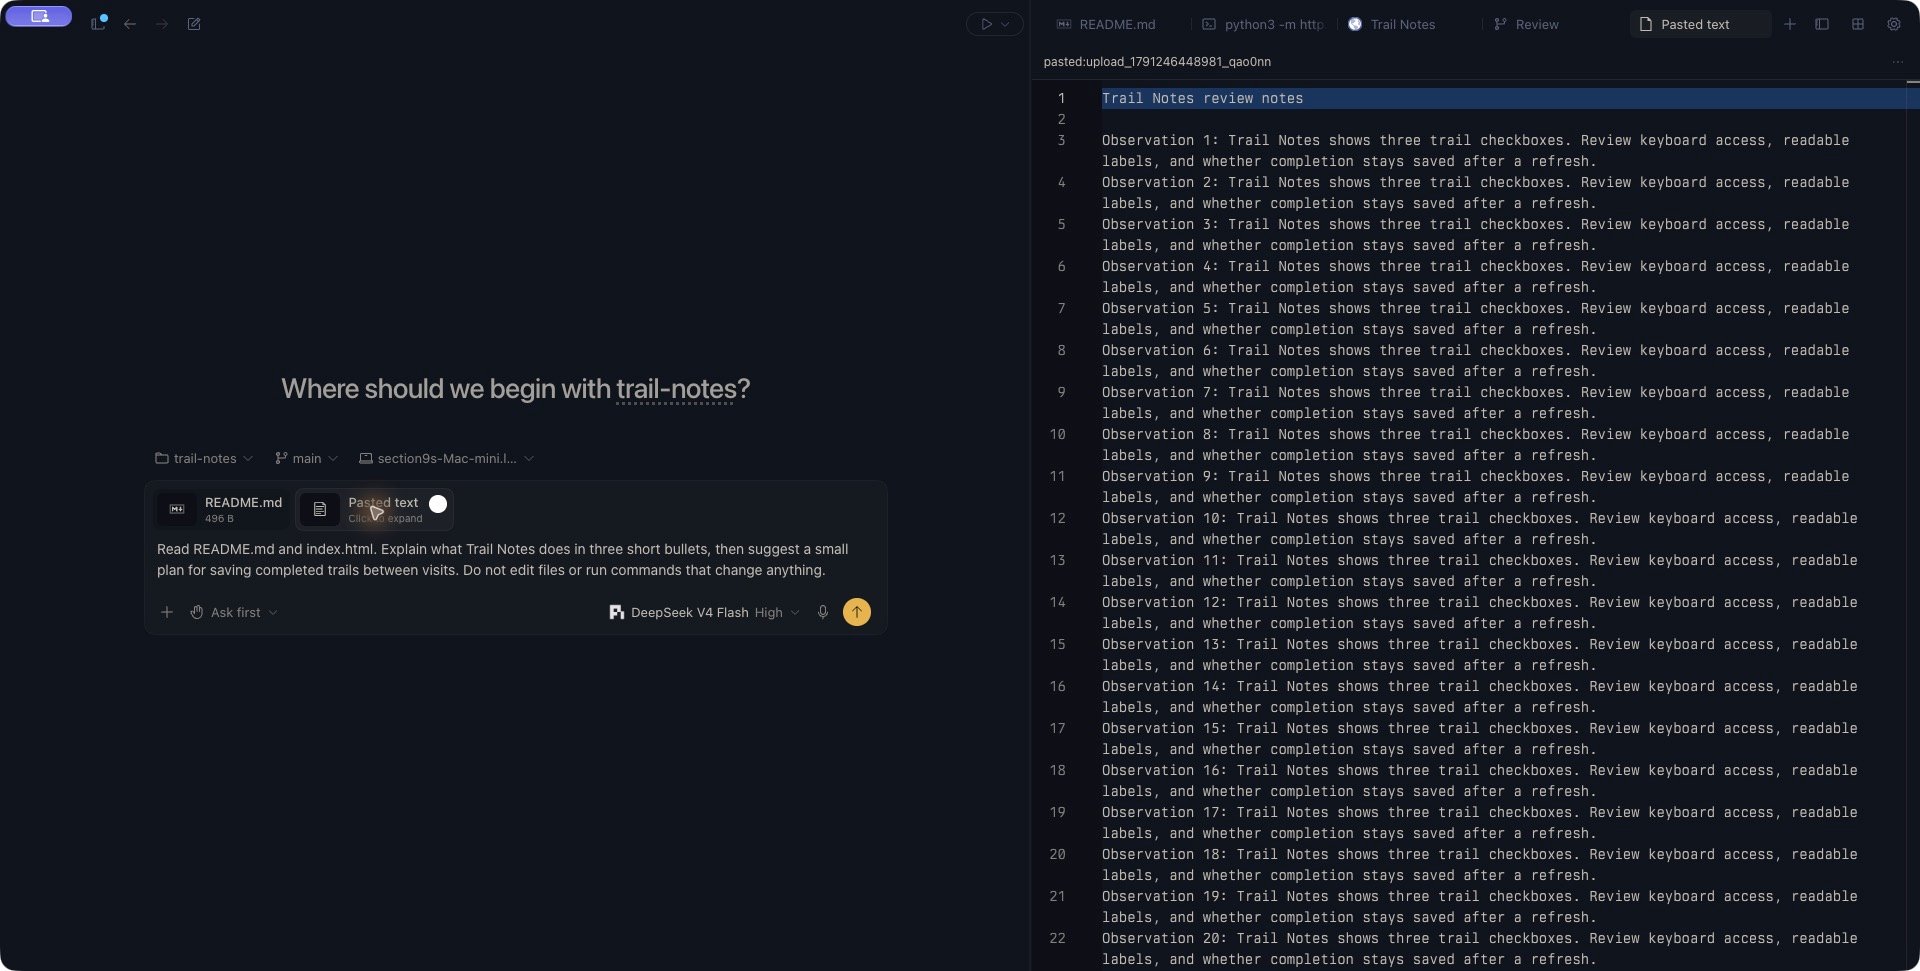
A long paste opened beside the draft. The reference text and the instruction remain separate.
Dictate a prompt
Voice input turns speech into editable text in your composer. Use it to describe an outcome while keeping the relevant files open beside your conversation in Zen. You need to be signed in to Kisuke, have an internet connection, and allow microphone access on the device where you are speaking. Audio is streamed to ElevenLabs Scribe for transcription. This connection is separate from the OpenAI, Anthropic, Google, or other model you select for the conversation. The dictated text becomes part of your request when you send it.Record and review on desktop or web
- Place the cursor where you want the text to appear.
- Select the microphone button, Voice input, or press Cmd+Shift+Space on macOS or Ctrl+Shift+Space on Windows and Linux.
- Allow microphone access if prompted. Wait for the control to become Stop recording, then speak. Text appears in the composer and can change as transcription updates arrive.
- Select Stop recording, or use the shortcut again. If setup is still connecting, the same button is labeled Cancel voice input.
- Review the complete draft, correct names and file paths, then send it using your normal composer controls.
Record on iOS or Android
Tap the composer’s microphone, allow recording permission, and speak when the recording control appears. The phone shows a waveform and a square stop icon. Tap that control to stop, then inspect and edit the text before sending. A second tap while connecting cancels setup. Wait for an active agent response to finish before starting phone dictation; the microphone is disabled while that response is streaming. On a permission denial, Microphone blocked can open the app’s system settings. Enable microphone access there and return to Kisuke.Limits and recovery
Dictation currently requests English transcription. Each recording ends after about two minutes, or after ten seconds without a new transcript update. Start another recording to add more text. These limits concern the recording, not the agent’s response.
In a web browser, microphone capture requires a secure context, such as HTTPS or localhost. An ordinary HTTP address on your local network can load the app while microphone capture remains unavailable.
Remove or replace an attachment
Move the pointer over a chip and select its × button to remove it from the draft. The file chip’s remove control is hidden during an active upload. Removing a chip does not delete your original file. To replace a file, remove the old chip and attach the updated file. Treat a picked attachment as a copy of the file at upload time, rather than a live link to later edits of the original.Troubleshoot an attachment
If the agent reports that it could not inspect the file, resolve that before relying on its analysis. Ask it to identify the file or section it used; a completed upload and a completed model response are different steps.