Before you start
Open the project on an available device. Its repository needs at least one commit and an existing branch to start from. Inspect Git changes and decide which files the new checkout should contain. An ordinary worktree starts from the selected branch’s committed files. It does not automatically carry over your staged changes, unstaged edits, or untracked files. Commit the changes you want to include first, or plan how to bring them into the new checkout. Project file-copy rules and setup scripts can add or modify files afterward. Review those settings before creating the checkout.Create a worktree from Zen
- Open a conversation in the project.
- Choose Show summary if the environment summary is hidden.
- Under Environment, select Local for the main checkout or Worktree for a linked checkout.
- In Continue in, find New worktree from branch.
- Select the branch whose committed files you want to start with, such as
main.
Detail of Zen's Continue in menu, separating existing worktrees from branches you can use to create another checkout.
View the full Zen workspace
View the full Zen workspace
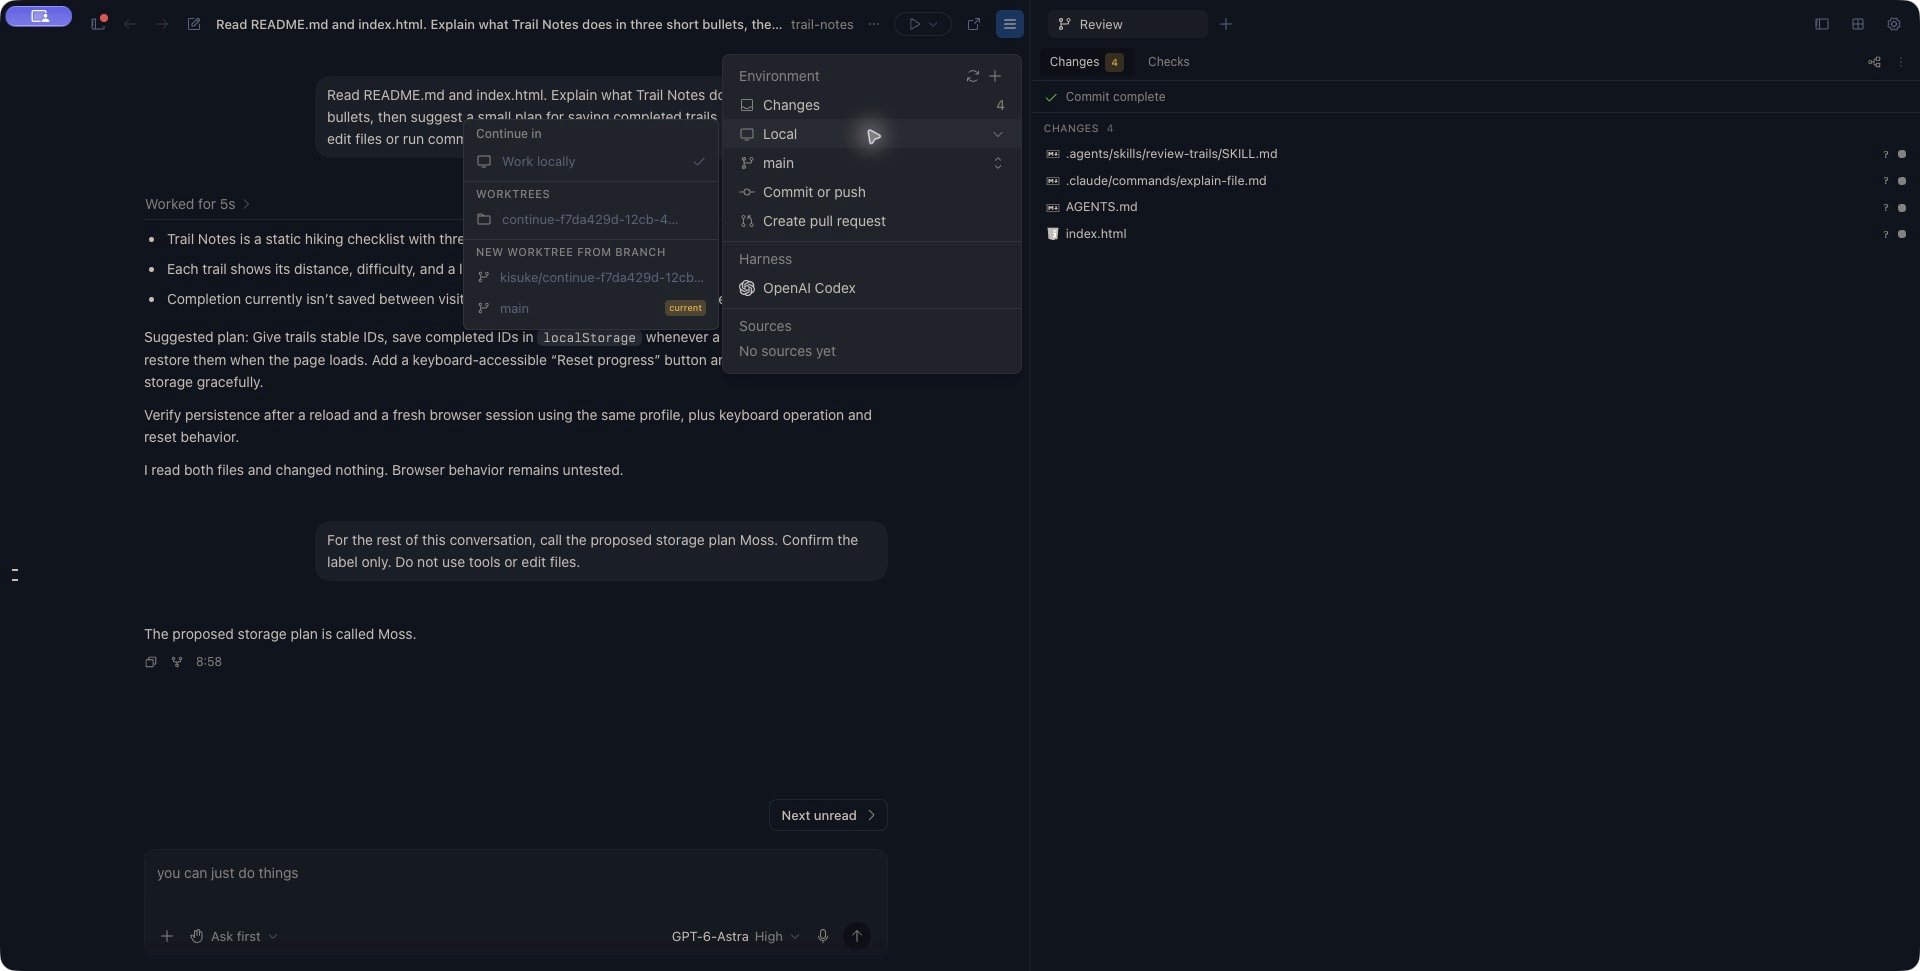
The Continue in menu changes the selected checkout. It does not perform the history-copying operation offered by Continue from this response.
Check the destination before sending
Wait for the destination workspace to open, then verify the folder, branch, and device above the composer. Open Files in the right panel and inspect a familiar file. If the composer shows New task, open its project picker. If Don’t work in a project is selected, choose Open Folder… and open the generated checkout on the correct device. Confirm that the composer now shows the checkout and branch before sending. This extra selection may be needed even though worktree creation succeeded. If you need to find the generated path, run this read-only command from the original repository’s Terminal:Inspect this checkout without changing files. Report the working directory and Git branch, list the project files, and summarize the README. Do not make edits.For example, if you have committed only
README.md and your app files are still untracked, the new worktree contains the README but not those app files. The first inspection helps catch that before you ask for an implementation.
For an independent check, open a Terminal in the destination and run:
Understand which files appear
File-copy rules can include ignored local files. They copy the main checkout’s current contents, even when you start worktree creation from another linked checkout. A matching rule can overwrite a file that Git just checked out, so inspect the resulting changes.
A file-copy error can leave the checkout in place. Verify that the local configuration or other files you need actually arrived before using them.
These are copies made during creation, not ongoing synchronization. Later edits in one working folder do not automatically update the other. Coordinate any shared external services or resources separately.
Location and setup
For ordinary worktrees, the default destination is.kisuke/worktrees/<generated-name> inside the repository’s main checkout. A configured Workspaces path changes that location; relative paths resolve from the main checkout. Creating a worktree while viewing another worktree still uses the main checkout’s configuration.
Open the main checkout’s Settings → Project to inspect Workspaces path, Files to copy, and Scripts → Setup. Shared configuration lives in .kisuke/project.json; local overrides live in .kisuke/project.local.json.
See Project scripts for configuration scope, Setup output, Run controls, and environment variables.
The setup script runs in the new checkout on the project’s device. In this ordinary creation flow, setup runs in the background: an open workspace or enabled composer does not prove dependencies have finished installing. Check the setup’s expected result before starting work that depends on it. A failed setup can leave a usable Git checkout with an incomplete environment.
Response continuation has different preparation rules: its new-worktree option carries over current Git changes and waits for setup before opening the chat. Follow that workflow’s file and setup guidance.
Switch between checkouts
From an open conversation’s environment summary, select Local or Worktree, then choose:- Work locally to open the repository’s main checkout on the same project device.
- An entry under Worktrees to open that managed checkout.
Remove a worktree you no longer need
First preserve any files and commits you need, and stop work that uses the checkout. Open the repository’s main checkout, open the environment menu, and use Remove worktree on the unwanted worktree’s row. The shared checkout controls require you to leave the selected worktree before removing it. Git may reject removal when the checkout contains changes. Inspect and preserve those changes before deciding how to proceed. The removal attempt closes terminals whose working directories are inside the checkout before asking Git to remove it. Those terminals can close even if Git later rejects removal. If an Archive script is configured, it runs before Git removal is attempted. Its failure does not guarantee that removal will stop; it is not a backup or a protection against deletion.Troubleshoot creation or selection
Creating another worktree is a new request and can allocate another folder. After a disconnect or uncertain result, inspect existing checkouts before repeating creation.