Open Review
- Open your project and check its device and folder.
- Open Zen’s right panel from the top bar.
- Choose Review in the launcher. If other tabs are already open, use the panel’s + menu and choose Review.
- Select Changes.
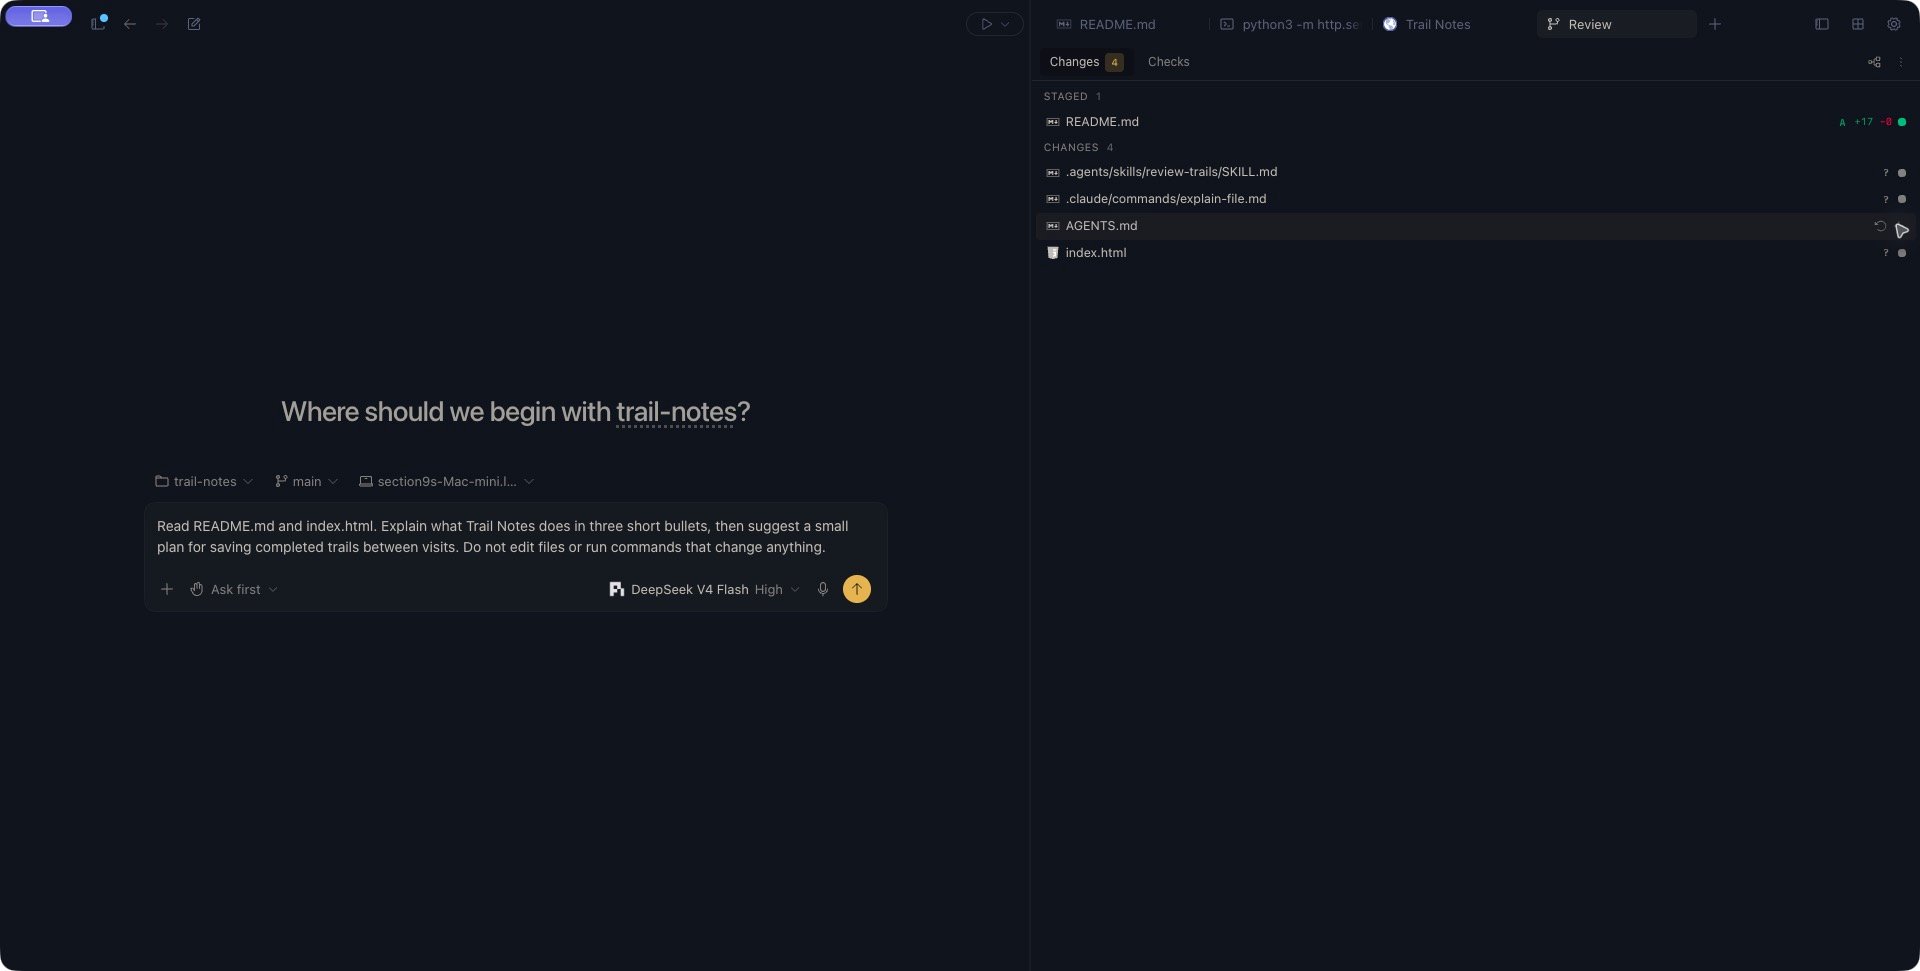
Review separates Staged from Changes. README.md is staged; four other files remain unstaged.
View the full Zen workspace
View the full Zen workspace
Read the file groups
Staged contains changes in Git’s index: the version you have prepared for a commit. Changes contains unstaged working-folder changes, including new untracked files. A file can appear in both groups. For example, if you stage a README and then edit it again, the staged version and the later edits are separate. Staging is not a commit and does not upload your work. The number beside the Changes tab counts files with unstaged changes. Check the Staged group too; a missing tab count does not mean there is nothing staged. Common status letters are:
When available, green and red numbers show added and removed lines. For a file with both staged and unstaged changes, these badges combine the two counts; they are not a staged-only preview. bin indicates binary content instead of a line count.
Open the file in Files when you need to read its current contents. Keep its tab beside Review so you can check the content before staging it.
Stage a file
- Find the file under Changes.
- Move the pointer over its row to reveal the actions.
- Choose the + action, Stage.
- Check that the file appears under Staged.
README.md changes its status from ? under Changes to A under Staged. Its contents stay in your working folder.
Unstage without losing edits
Move the pointer over a file under Staged and choose Unstage. This removes that file’s changes from the index while keeping its working-folder contents. The changes return to Changes when they still differ from the committed version. A newly added file becomes untracked again. You can edit it further and stage it later.Discard unwanted edits
Under Changes, a file’s hover actions also include Discard changes. Kisuke asks you to confirm the selected path. Read the file and preserve anything you need before confirming. Discard applies to the selected file’s working-folder changes; it is not a way to undo a commit.Refresh or resolve a missing repository
Open More → Refresh to request fresh Git status. If a staging action does not appear to take effect, refresh and inspect both groups before repeating it. Check the selected project device and its connection if the status remains unavailable. These states mean different things:
If an existing repository is unreadable, resolve the reported problem before trying to initialize a repository. Initialize repo starts a separate setup flow; it is not a refresh action.
Continue with pull requests in Zen, or use Git recovery when conflicts, authentication, or an interrupted operation need attention.