$ARGUMENTS wherever you want Kisuke to insert the text you supply.
Use a command for a repeatable request such as explaining a file or reviewing a change. Use a skill when you want reusable instructions alongside a separate task.
Create a command file
For a project command, create.claude/commands/explain-file.md in the project’s working folder:
index.html for $ARGUMENTS before passing the prompt to the harness. The Argument Hint describes the expected input in the composer menu; the placeholder in the template performs the substitution.
The file path is part of the prompt. This template asks the agent to read it; it does not attach the file or prove that the file exists. Check the agent’s response and file references.
Create a command in Settings
On desktop, open Settings → Skills and choose + Command.- Enter a Name, such as
explain-file, and a Description. - Set Argument Hint to a short label such as
<file path>. - Choose User or Project scope. If Project is disabled, use the project-file method above.
- Enter the prompt under Command Template, including
$ARGUMENTSwhere the supplied text belongs. - Choose Create Command and check that it appears in the list.
Invoke from the composer
For theexplain-file template above:
- Open a conversation in the project that contains the command file.
- Type
/explain-file. Check the Project entry, its description, and the<file path>hint. - Select the entry. Because this template contains
$ARGUMENTS, Kisuke inserts a command chip and leaves the draft open. - Type
index.htmlafter the chip, then send the message. - Check the agent’s file read and explanation.
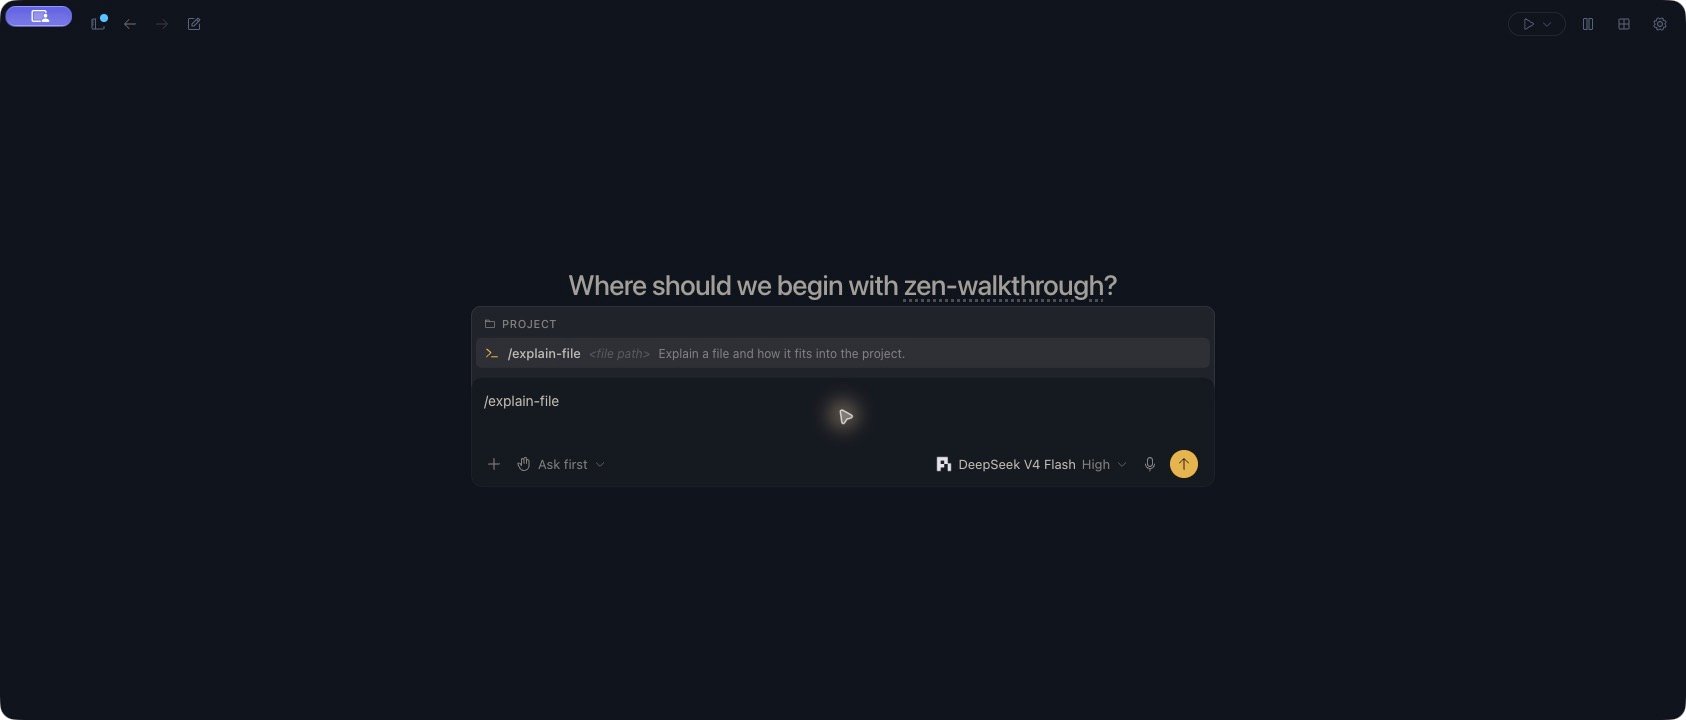
The project command appears in Zen's slash menu with its file-path argument hint.
View the command draft in Zen
View the command draft in Zen
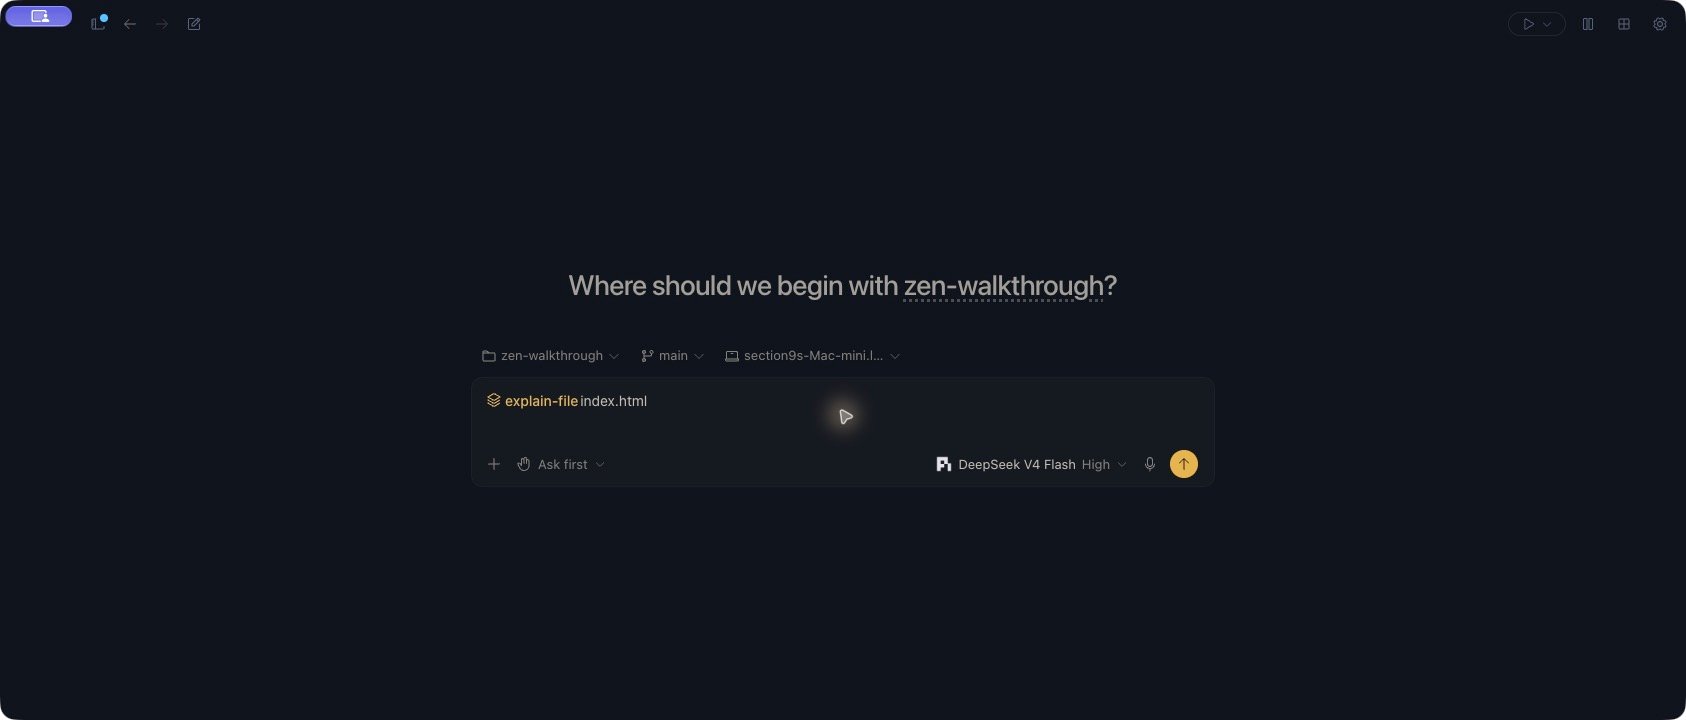
index.html substituted, read that file, and returned an explanation. It did not change the project files. Check the response’s line ranges against the file, and ask for corrected references if they do not match.
When names collide, use the scope and path shown in the menu to choose the intended command. If you created the file while a chat was already open and it is missing from the menu, open a new conversation in the same project and try again.
A command whose template has no
$ARGUMENTS placeholder can send as soon as you select it, including when you accept the highlighted menu entry with Enter. Read the saved template before invoking it. Choosing a command is not always a preview step.Built-in commands and harness commands
The slash menu also contains Kisuke actions and commands supplied by the active harness. Those entries are separate from saved prompt templates. Their behavior and availability depend on the action and harness. For example,/compact invokes Kisuke’s manual compaction request. Its presence in the menu does not establish that every harness can compact on demand. Read the result before assuming context was reduced.
Scope and file locations
For a remote project, put the command on the device that owns the project. A command on your viewing device alone is not the remote project’s command file.
The
.claude directory is the supported location for these custom prompt templates; the expansion is part of Kisuke’s shared submission path. Do not copy the command into every harness’s directory to make this Kisuke template available.
Direct name-based invocation searches the project directory before the user directory. Selecting a menu entry retains its particular file path. If that file is no longer available, select the command again.
Organize commands into folders
You can group command files under subfolders:/review:accessibility and /review:tests. Create nested structures in the filesystem; the Settings creation form normalizes a name into a single filename.
Use distinctive lowercase names with hyphens. Avoid reusing built-in names such as /plan, /review, or /clear, which already have actions in the composer. Keep the filename as the command name rather than overriding it with a name frontmatter field; this makes typed invocation and catalog display agree.
Edit or remove a command
Open its row or edit control in Settings → Skills, change the template, and choose Save Changes. You can also edit the.md file directly. Editing the Name field does not rename an existing command file; rename the file when you want to change its typed command name.
The delete control removes the command file. Keep a copy or use version control if you may need to restore it.