> ## Documentation Index
> Fetch the complete documentation index at: https://docs.kisuke.dev/llms.txt
> Use this file to discover all available pages before exploring further.
# Set up the desktop app
> Sign in to Kisuke, set up Connect, connect an AI provider, and enter your first Zen workspace.
[Install Kisuke](/get-started/install) first, then open the desktop app and follow its setup wizard. Returning users may see fewer steps because some connections are already configured.
You will set up three separate parts:
| Part | Purpose |
| - | - |
| Kisuke account | Signs you in to Kisuke. |
| Connect | Runs the background service that handles sessions on this computer. |
| AI provider | Supplies access to the models you want to use. |
Signing in to Kisuke with Google is separate from connecting Google as an AI provider. Likewise, the GitHub setup step checks GitHub CLI access on your computer; do not assume that a Kisuke sign-in alone completes it.
## Sign in to Kisuke
At **Welcome to Kisuke**, choose **Continue with Google** or **Continue with GitHub**. Complete the sign-in flow and return to the app. Review the terms and privacy information shown by the app before signing in.
If sign-in fails, read the displayed error. Use **Cancel** to leave a pending sign-in attempt before starting another one.
## Set up Connect
At **Set up Connect**, choose the installation scope:
* **Just for me** is the recommended choice for most users.
* **For all users** selects a system-level installation and requires administrator access.
The screen also offers **Launch Connect at login** and **Enable notifications**. Choose the startup behavior you want. Notifications have both an app preference and an operating-system permission; a denied OS permission must be changed in the operating system's notification settings.
Choose **Set up Connect**. The progress card shows the current stage, such as linking the account, installing, starting, or connecting. Wait for **This device is ready** before continuing.
If the button says **Checking devices…**, Kisuke is still checking your connected devices. That is a different stage from connecting an AI provider.
### Resolve a Connect setup problem
| State | Next step |
| - | - |
| **Setup failed** | Read the error and expand **Show details**. Address the reported cause, then use **Retry**. |
| **Restart Connect** is offered | Use it when you are ready to restart the affected Connect process. It can interrupt work using that process. |
| A **Connect conflict** is shown | Identify the other process or window in the message. Close it yourself, or use the offered stop action when you are ready to stop it. |
| Setup returns to Connect on a later launch | Check the current connection. A previous installation does not establish that Connect is reachable now. |
Keep the error and failed stage if you need help. Details can include account identifiers and local paths, so review them before sharing.
## Review Device Sync when it appears
The wizard may show **Device Sync** after Connect is ready. It can skip this step when discovery determines there is no online peer to sync with or synchronization is disabled.
Check the reported progress and any items that need attention. The normal successful path advances automatically. **Continue manually** appears only when the current sync status allows it; it is not a confirmation that every item synchronized successfully.
Review [what Device Sync shares](/workspace/device-sync), including the default-on provider credentials and agent preferences. Other data categories, installations, and deletions have separate controls.
## Connect an AI provider
At **Connect an AI provider**, choose **Connect Provider** to open provider settings. Connect OpenAI, Anthropic, Google, or another provider offered there using its available authentication method.
See [Connect providers](/models/providers) for the distinction between API keys, sign-in integrations, and Google versus Antigravity. You can add more providers later; your model picker depends on the connected provider and selected harness.
If an account is already connected, the wizard shows the connected provider names. **Skip for now** lets you configure access later. Skipping this screen does not establish that a usable model is available for your first message.
## Finish the remaining setup steps
The wizard offers several additional steps. Use the status and available controls on each screen:
| Step | What to do |
| - | - |
| **Set up GitHub** | Follow the GitHub CLI installation or authentication guidance if you want GitHub access. Use **Skip for now** if you do not need it yet. A successful check offers **Continue**. |
| **Import from Conductor** | This appears when Conductor is detected. Review **Choose what to import**, then import or skip. |
| **Pair your phone** | [Scan the QR code from your phone](/workspace/devices#pair-your-phone), or skip for now. You can pair later from Settings → Devices. |
| **Find your chats** | Review discovery progress. Choose **Continue in background** to enter the workspace before it finishes, or **Open Workspace** when complete. |
The number of steps can vary with existing configuration and detected tools. You do not need to wait for chat discovery to finish before entering the workspace.
## Start in Zen mode
1. [Open a project](/projects/open-a-project) and confirm the device and working folder.
2. Switch to [Zen mode](/zen-mode) if it is not already active.
3. Open the [model picker](/models/overview), choose an available harness for the new conversation, and select a model.
4. Review the [permission mode](/conversations/permissions). Use **Ask first** when you want approval requests for actions that require them.
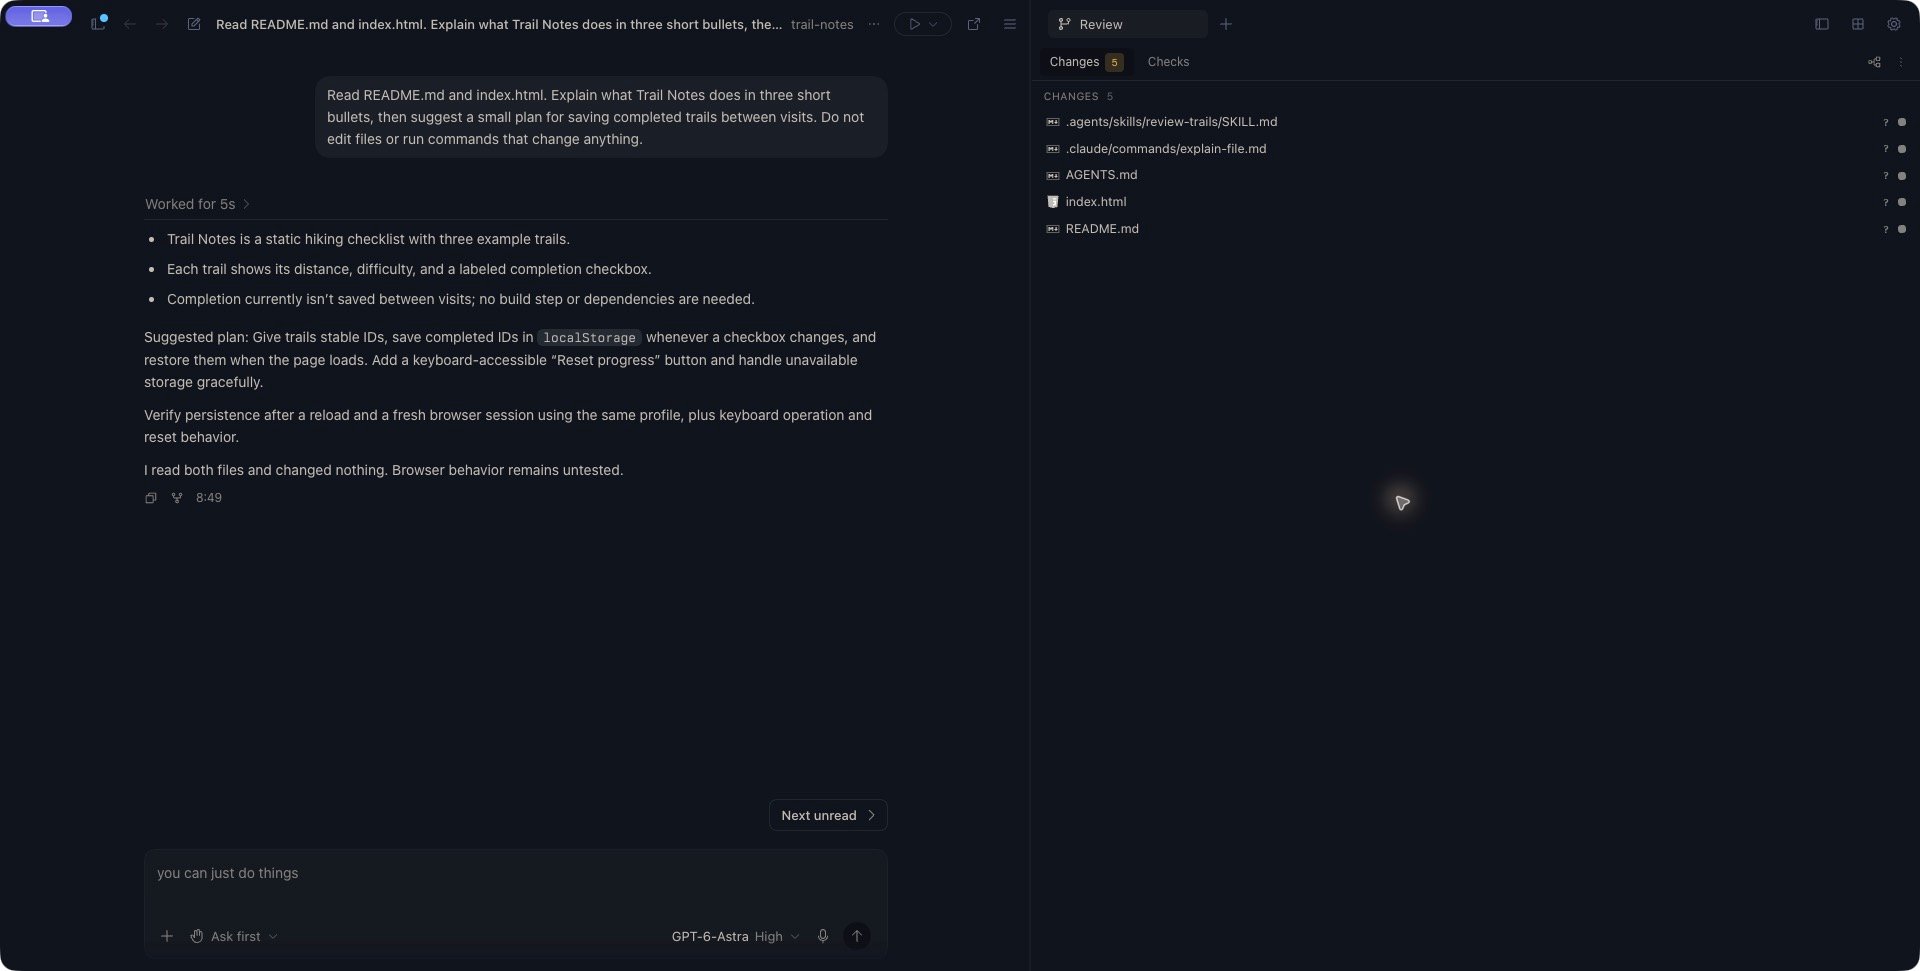
5. Send a small request grounded in the project, such as:
```text theme={null}
Read the README and explain what this project does.
Identify the main entry points. Do not edit files.
```
Check the response against the project files. Then ask for a [plan](/conversations/planning), open [files](/workspace/files), or bring a [terminal](/workspace/terminal) beside the conversation.
For a guided introduction to the layout, [take the first Zen tour](/zen-mode#take-a-first-tour). It walks through choosing the destination and model, asking a bounded question, and checking the answer beside the source files.
 If the first message is restored or cannot start, use [Troubleshoot a first message](/help/starting-a-chat). A visible model name or completed setup wizard alone does not establish that the selected model is ready to accept the request.
This documentation is built and hosted on [Mintlify](https://mintlify.com), a developer documentation platform.
If the first message is restored or cannot start, use [Troubleshoot a first message](/help/starting-a-chat). A visible model name or completed setup wizard alone does not establish that the selected model is ready to accept the request.
This documentation is built and hosted on [Mintlify](https://mintlify.com), a developer documentation platform.